To start making money with Google AdSense, you need to add the AdSense Ads to your website.
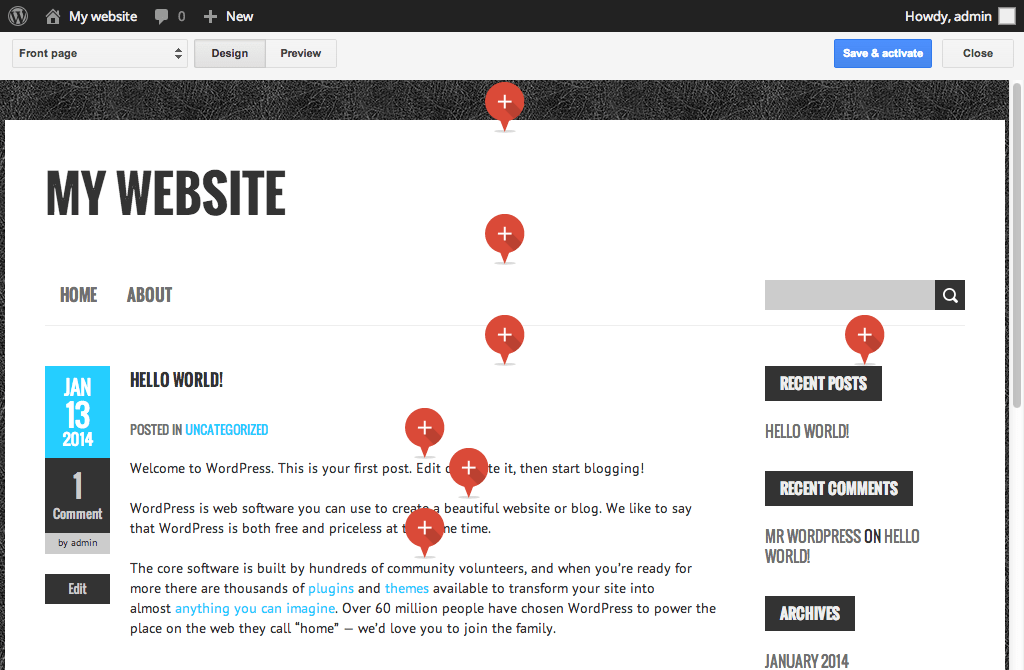
When it comes to WordPress websites or blogs, there are two recommended ways to do this.
First, is through the use of the official Google AdSense plugin and second by making some simple changes to your WordPress files (my preferred way).
Let’s see these two methods in more details.
How to add Google Adsense Ads to my WordPress Website? (with a Plugin)
The Google AdSense team has created a plugin for WordPress users, to make it easier to add AdSense to their websites.
Update March, 2017: Google has announced that the AdSense Plugin is going away so it’s better to go straight to the part of adding AdSense to your website manually.
You can download and install the plugin from the WordPress repository, here is the link.
There are detailed instructions on how to configure the plugin here.
Note: If you decide to use the plugin, make sure that you remove any AdSense ad placements that you added to your website without the plugin.
Although the plugin is easy to use, I prefer to add AdSense ads manually to my websites since you have more control on where the code will appear and you don’t have to worry about making changes to your theme or templates.
The plugin enables you to add the Ads without making changes to code but this means that if you change theme or the layout of your pages, you will have to configure the plugin again (unless you have used the manual placement options).
In the case of adding the code manually (see below) to your theme, it’s a matter of copy/paste the code from one theme to the other.
Add AdSense Ads by Editing your WordPress Files (Without a Plugin)
My preferred way to add AdSense to WordPress, is the manual way. It does involve making changes to the code but once you do it for one website, you can easily re-use the code for other websites.
On a typical WordPress blog, you can place AdSense ads in the following places:
- In the sidebar (widget).
- On top of the page (below the header)
- Between your blog posts (for example, after the 2rd paragraph)
- Below your blog posts
How to place AdSense Ads in a Widget
In this case, adding AdSense ads is a matter of copy/paste the code provided by AdSense to a ‘text widget’, in the appropriate widget area.
The steps to follow:
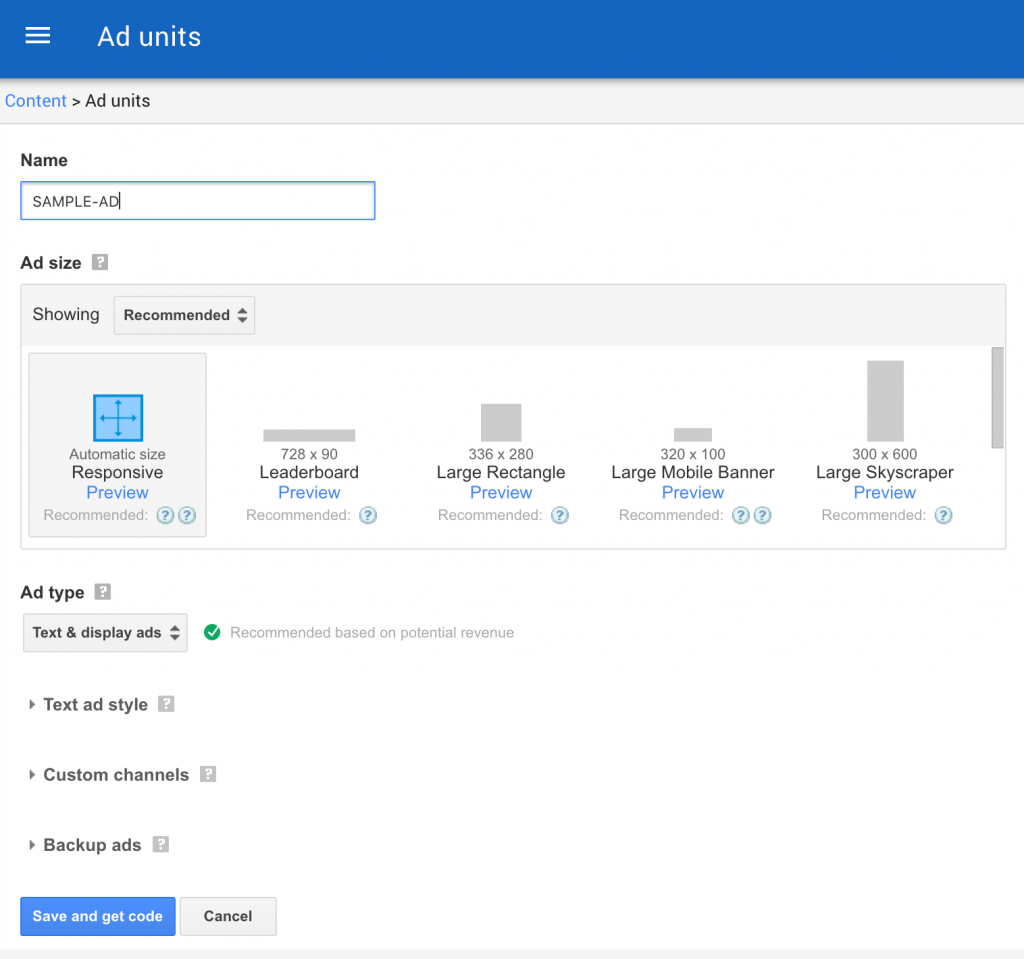
- Login to your AdSense account and click ‘Ad Units’ which is found under ‘My Ads’ menu.
- Click the ‘+New Ad Unit’ and select ‘Text & Display Ads’.
- Type a name for your Ad unit, select ‘Responsive’ from the Ad Size menu and click ‘Save and get code’.
Hint: Use a name the accurately describes the ad type and position. For example, ‘Home Page, Top Banner, Responsive’.
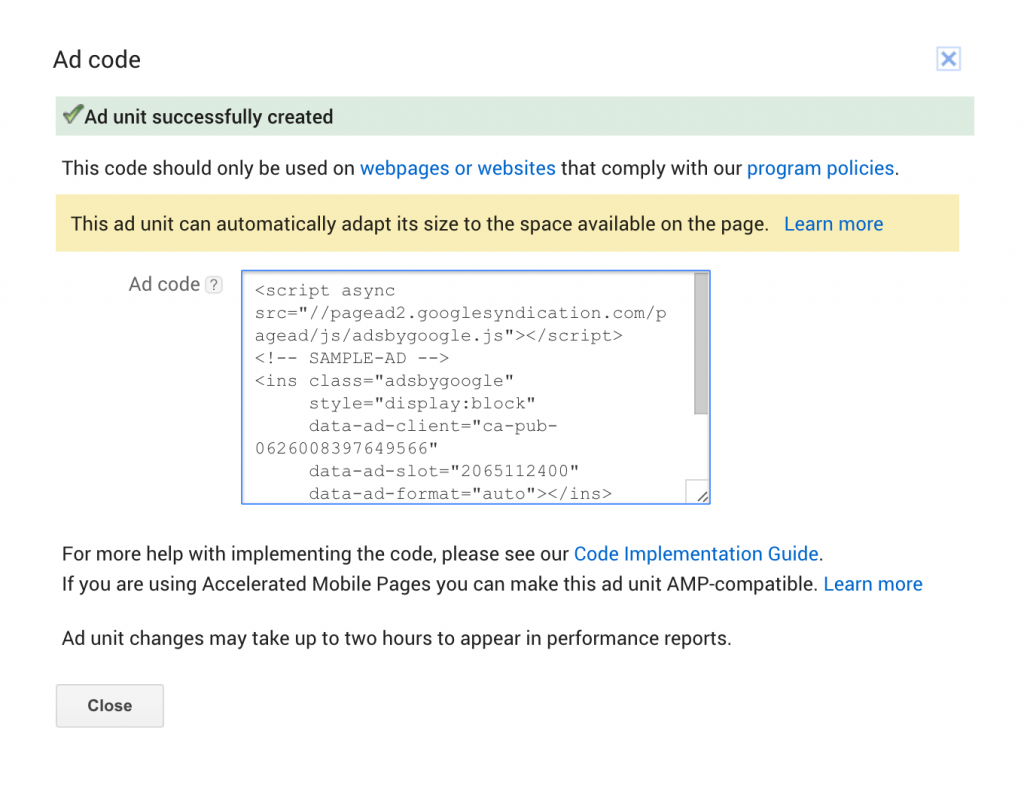
Copy the Ad code provided by Adsense.
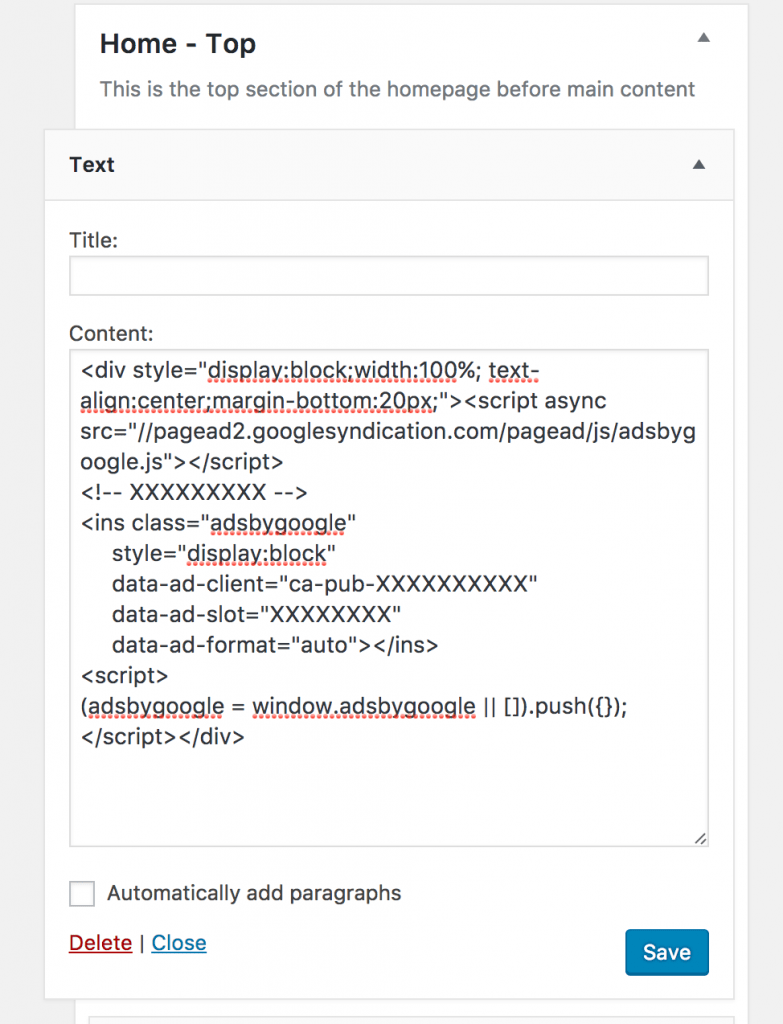
Paste the code to a Text Widget and place it to the appropriate Widget Area.
You can now SAVE the widget and in a few minutes, AdSense will start showing on your website.
You can follow the exact same procedure, whenever you want to add Adsense to any widget in WordPress.
Note: You can wrap the Adsense code in a <div> and set the width to 100% and add other styling properties to make the ads look good (see the example above).
This is an example of Adsense Ads in the Sidebar.
How to Add AdSense to WordPress Without a Plugin?
IMPORTANT: The examples below are based on the Genesis Framework. If you are NOT using a genesis child theme, then you need to change the hook specified in the ADD_ACTION line (first part of the code) to match the hooks available in the core WordPress installation. View the complete list of WordPress Actions.
IMPORTANT 2: If you make a mistake in your functions.php file, your WordPress website will not load so make sure that you make a backup of your file before editing.
How to Add AdSense Ads at the top of a page (below the header)
To add AdSense to appear at the top of your posts, you will need to add the code below to your functions.php file.
Note: Before continuing to the next step, you need to follow the procedure above to create a new AD Unit in your AdSense Account.
Use an FTP client and locate the functions.php file (the location of the file is at: /wp-content/themes/yourtheme/functions.php)
Edit the file and add the code below.
add_action('genesis_before_content', 'header_ad');

function header_ad() {

if (is_page() || is_category() || is_search() ) { ?><div class="adsense-top"><style type="text/css">

.adslot_4 { width: 1000px; height: 90px; }

@media (max-width:420px) { .adslot_4 { width: 300px; height: 250px; } }</style>

<script async src="//pagead2.googlesyndication.com/pagead/js/adsbygoogle.js"></script>

<!-- XXXXXXXX -->

<ins class="adsbygoogle adslot_4"

style="display:inline-block"

data-ad-client="ca-pub-XXXXXXXXXX"

data-ad-slot="XXXXXXX"

</ins>

<script>

(adsbygoogle = window.adsbygoogle || []).push({});

</script>

</div>

<?php }}
The above code will add to any single page, category page or search page an AdSense ad that is wrapped with a css class (adsense-top).
Notice how I changed the AdSense code to force the ads to appear as 300×250 when the viewed on mobile (below 420px resolution).
Note: You need to use your own AdSense Code for the Ads as provided by AdSense.
Add AdSense After the 2ndst Paragraph Within Blog Posts
Let’s say that you want ads to appear after the second paragraph in all your blog posts. You can accomplish this by adding the code below to your functions.php file.
//ADD ADSENSE AFTER 2ND PARAGRAPH

add_filter( 'the_content', 'prefix_insert_inpost_ads' );

function prefix_insert_inpost_ads( $content ) {

$ad_code =’ <div class="googleadsrectangle">

<style type="text/css">

.adslot_1 { width: 650px; height: 280px; }

@media (max-width:420px) { .adslot_1 { width: 300px; height: 250px; } }

</style>

<script async src="//pagead2.googlesyndication.com/pagead/js/adsbygoogle.js"></script>

<!-- SAMPLE ADD -->

<ins class="adsbygoogle adslot_1"

     style="display:inline-block"

     data-ad-client="ca-pub-XXXXXXXXXXXX"

     data-ad-slot="XXXXXXXX"

</ins>

<script>

(adsbygoogle = window.adsbygoogle || []).push({});

</script>

</div>';

if ( is_single() && ! is_admin() ) {

return prefix_insert_after_paragraph( $ad_code, 2, $content );

}

return $content;

}

function prefix_insert_after_paragraph( $insertion, $paragraph_id, $content ) {

$closing_p = '</p>';

$paragraphs = explode( $closing_p, $content );

foreach ($paragraphs as $index => $paragraph) {

if ( trim( $paragraph ) ) {

$paragraphs[$index] .= $closing_p;

}

if ( $paragraph_id == $index + 1 ) {

$paragraphs[$index] .= $insertion;

}

}

return implode( '', $paragraphs );

}
Things you should know about the above code:
- You should copy/paste the code given by AdSense in the $ad_code variable and replace the code shown in bold.
- If you want the ads to appear after the first paragraph or any other position, change the number 2 to the desired value in the line: return prefix_insert_after_paragraph( $ad_code, 2, $content );
Here is an example of a full-width AdSense ad unit shown after the second paragraph.
Add AdSense Ads Below WordPress Posts
To add AdSense below your posts, you simply need to use the same logic like the “Top of Posts” but change the hook so that the ads will appear below the posts.
Here is the code template to use:
add_action('genesis_after_entry_content', 'google_bottom_ads');

function google_bottom_ads() {

if ( is_single() ) { ?>

<div class="googleadsrectanglebottom">

<style type="text/css">

.cs-posts-bottom-resp { width: 650px; height: 280px; }

@media (max-width:420px) { .cs-posts-bottom-resp { width: 300px; height: 250px; } }

</style>

<script async src="//pagead2.googlesyndication.com/pagead/js/adsbygoogle.js"></script>

<!-- XXXXXXXXXXXX -->

<ins class="adsbygoogle cs-posts-bottom-resp"

style="display:inline-block"

data-ad-client="ca-pub-XXXXXXXXXXXX"

data-ad-slot="XXXXXXXX"></ins>

<script>

(adsbygoogle = window.adsbygoogle || []).push({});

</script>

</div>

<?php } };
Here is an example of an AdSense Ad unit shown below a blog post.
Conclusion
If you find the above code confusing, then go with the first option and use the official Google AdSense plugin to add the ads to your WordPress blog.
It’s easier to use and doesn’t require editing your website files. If you feel confident with editing your functions.php file then you can use the code templates above and have more control on your Ads.
Either way, it’s always recommended to use RESPONSIVE AD UNITS so that your ads will show properly on your desktop and mobile websites.
In case something is not clear, let me know in the comments.






Awesome guide. This helped me alot.
Thanks, really helpful and clear. Would you recommend using the Custom HTML widget available in WordPress or the text widget?