In this tutorial, you’ll learn how to use Google Keyword Planner (previously known as the Google Keyword Tool) to perform keyword research for SEO purposes.
By the end of this tutorial you’ll know:
- What Google Keyword Planner is
- How to create a free Google Keyword Planner account
- How to use Google Keyword Planner to get keywords ideas
- How to choose the right keywords for your SEO campaigns
- How to find long-tail keywords
- How to get the monthly search volume for keywords
- How to find what keywords your competitors are using
- How to analyze a list of keywords in bulk
- How to use Google Keyword Planner for local SEO purposes
- How to export Google Planner data to an Excel file
What is Google Keyword Planner?
Google keyword planner is a free keyword research tool provided by Google to Google Ads customers. With Google keyword planner you can find keywords and search terms to use in your SEO and Google PPC campaigns.
Besides getting basic information about keywords like monthly search volume, you can also extract other useful information like the search volume per location and device and forecast statistics.
Is Google Keyword Planner Free?
Google Keyword Planner is free but to gain access to the tool, you need to create a Google Ads account. With your free account, you’ll be able to use the tool and at the same time, you’ll have a Google Ads account ready for running paid campaigns on the Google Network.
While the primary purpose of Google Keyword Planner is to provide keywords ideas for your Google paid campaigns, you can also use it to do keyword research for your SEO campaigns.
You’ll find below some nice hacks on how to extract valuable information about your chosen keywords.
How to Use Google Keyword Planner
Follow the steps below to use Google Keyword Planner for keyword research.
- Create a Free Google Keyword Planner Account
- Find New Keywords Ideas
- Refine keywords to exclude brand-related searches
- Choose the right keywords for your SEO campaigns
- Find long-tail keywords
- Find the exact search volume of keywords
- Find keywords your competitors are using
- Get the search volume for multiple keywords (bulk analysis)
- Find keywords for Local SEO campaigns
- Export your keyword data to an Excel file
Watch the video tutorial to learn how to use Google Keyword Planner tools for SEO keyword research. It covers all the steps in this post and additional information.
Step 1: Create a Free Google Keyword Planner Account
To be able to use Google Keywords Planner you first need to create a free Google Ads account. So, when you follow the instructions below, you’ll gain access to the tool and at the same time, you’ll have a Google Ads account ready to use for running paid campaigns on the Google Network.
Follow these steps:
Open a new browser window and navigate to Google Keyword Planner.
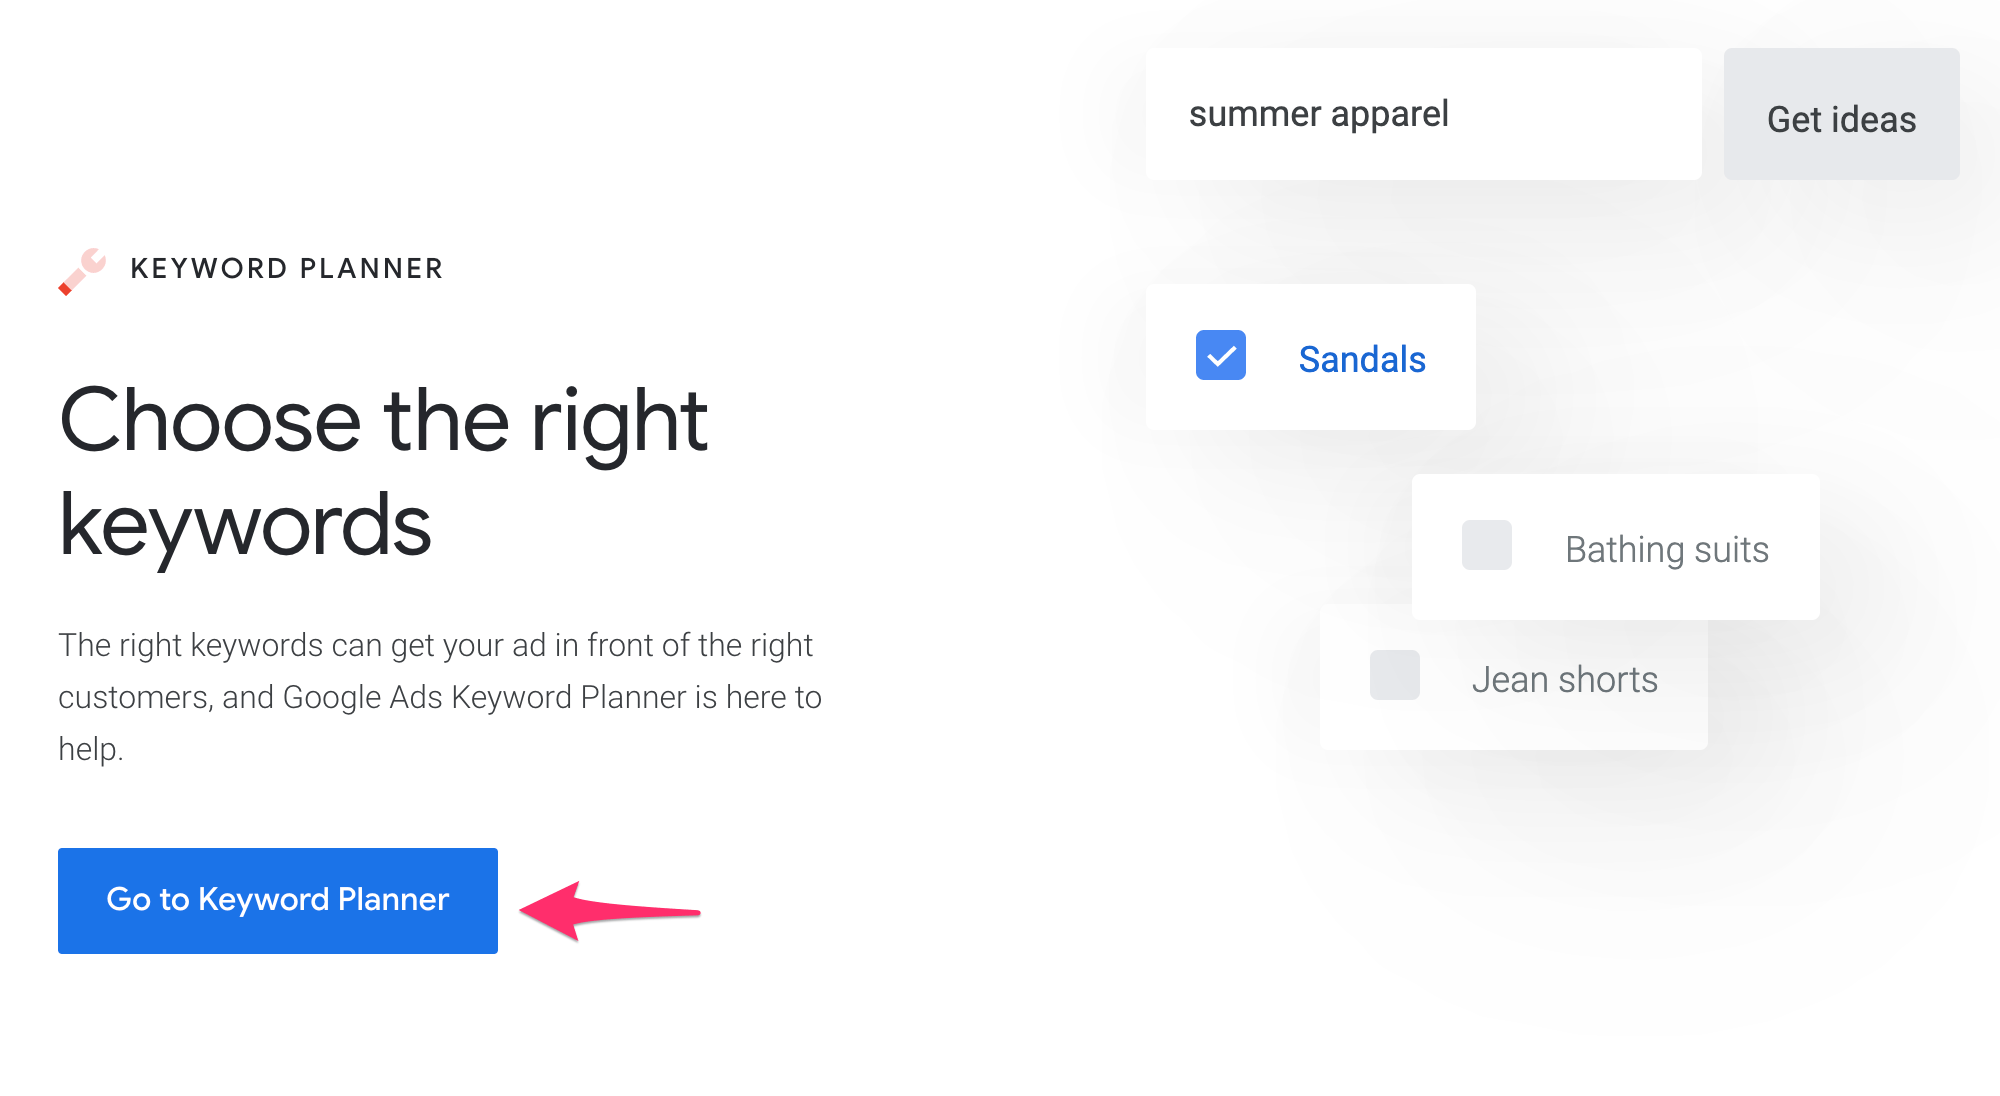
Click the button “Go to Keyword Planner”.
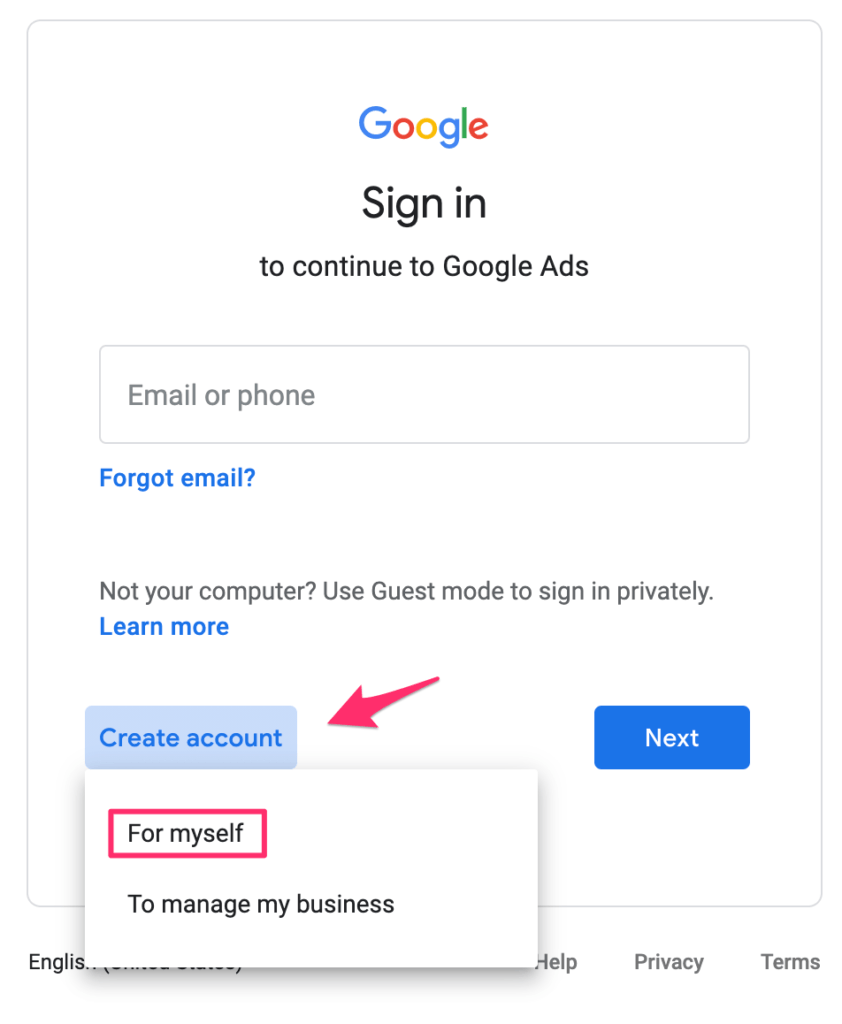
You’ll be prompted to log in to an existing Google Ads account. If you don’t have an account yet, click “Create Account” and select “For myself” from the dropdown list.
Fill in your first name, last name, email address, and choose your password and click “Next”.
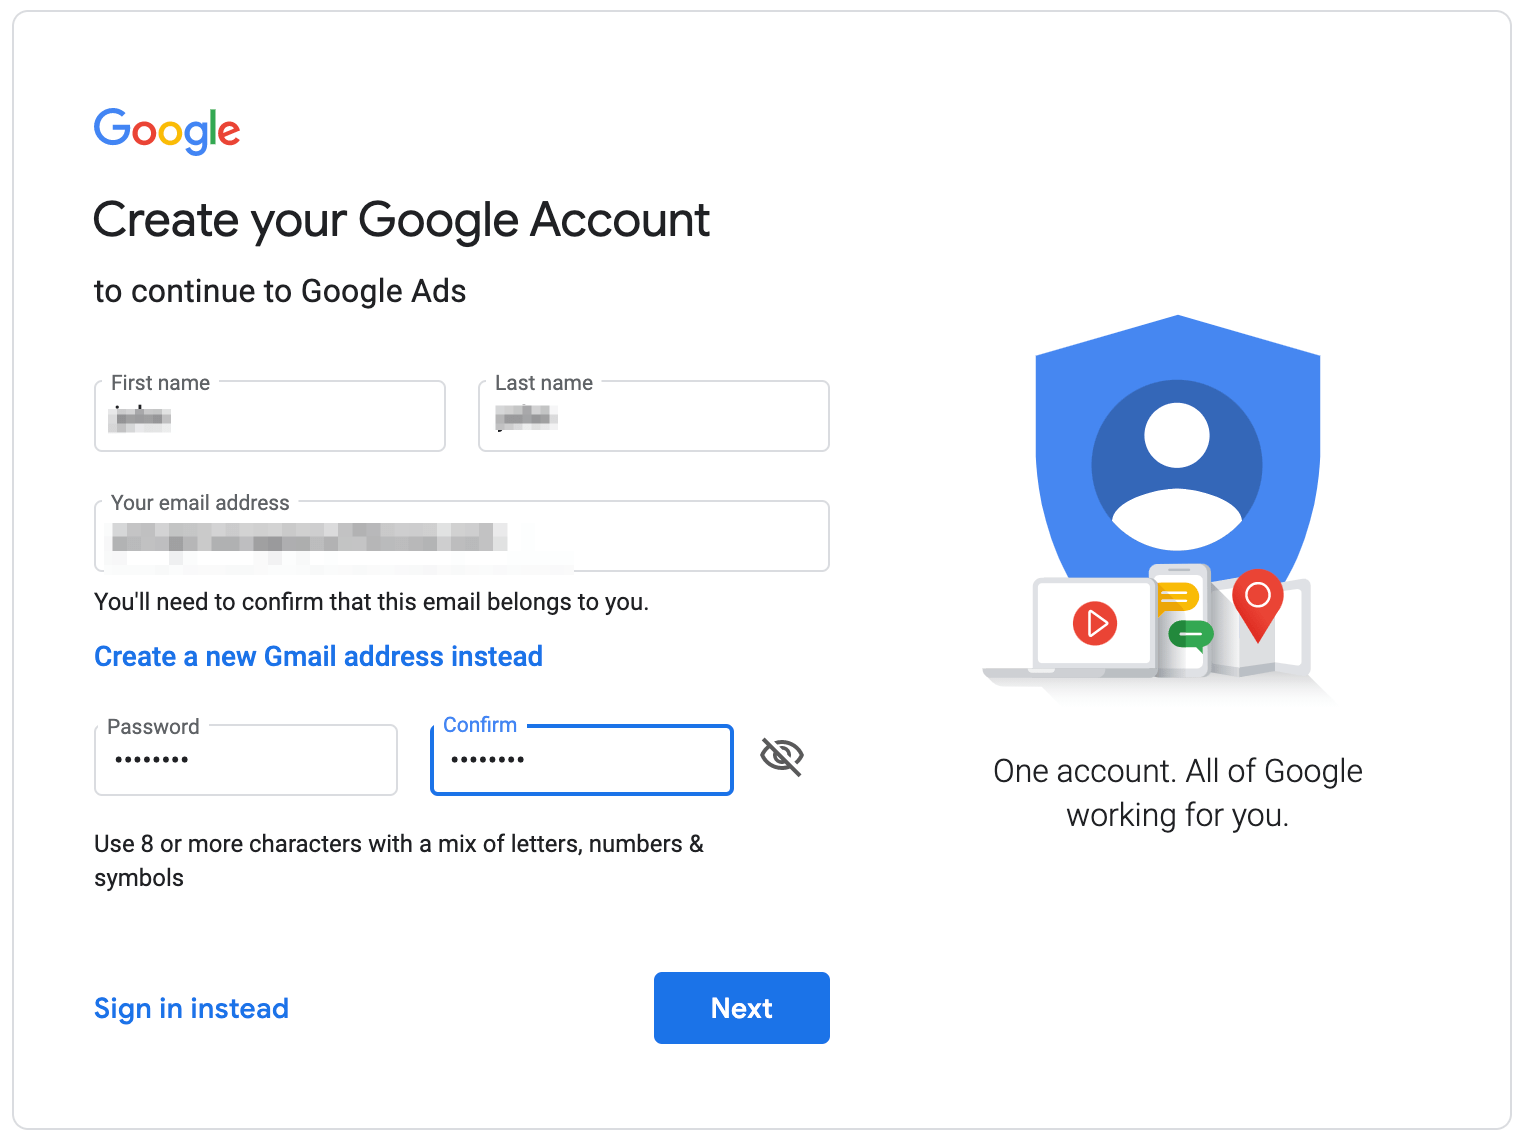
You’ll be sent a confirmation code to verify your email address.
Next, you’ll be asked some additional information about your account like:
Phone (optional), Date of Birth, and Gender.
Next, you’ll be prompted to accept the Google Terms of Service and create your account.
As a final step, you need to choose your Billing Country, Time Zone, and Currency.
Although you won’t be charged anything, Google requires this info in case you need to activate campaigns in your Google Ads account.
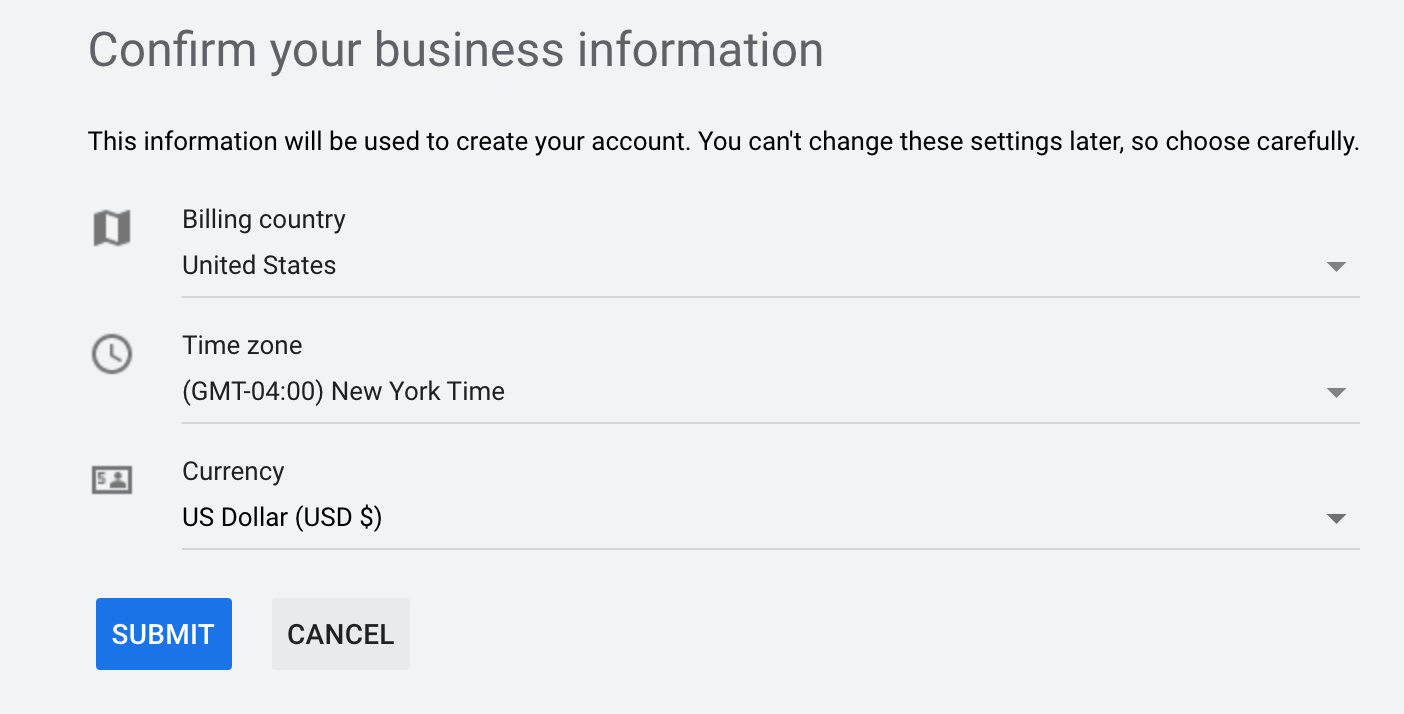
When you’re ready to proceed click the “Submit” button.
That’s it, you’ve just created a new Google Keyword Planner and Google Ads account!

You can now start using Google Keyword Planner.
Click “Explore Keyword Planner” to continue and close the guided tutorial that will popup.
Step 2: Find New Keywords Ideas
Now that you’re account is set up and ready to use, the next step is to start using the keyword research tools of Google Keyword Planner.
There are two tools you can use:
- Discover new keywords
- Get search volume and forecasts
Let’s start by clicking the “Discover New Keywords” option.
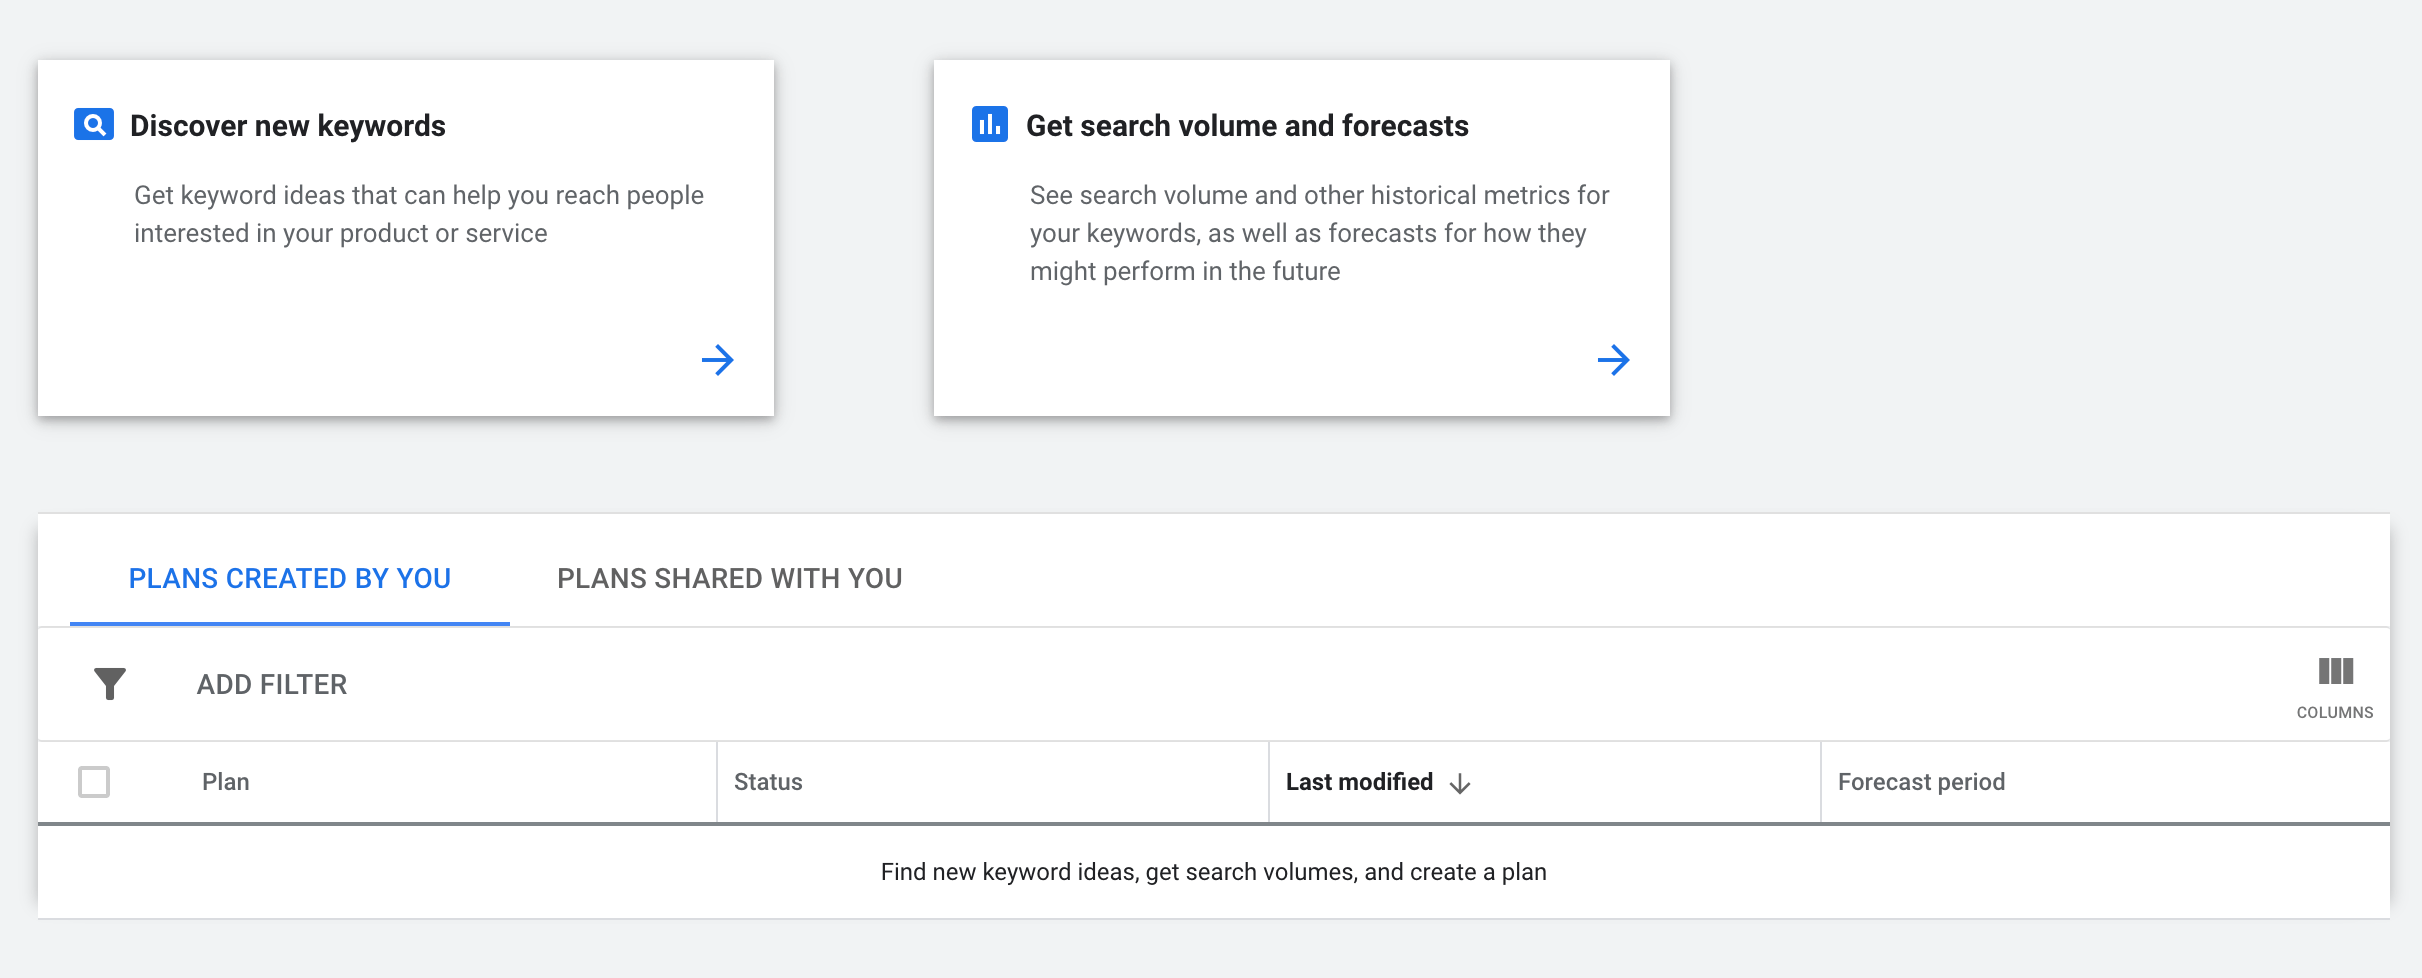
With the ‘Discover new keywords’ tool, you can find keywords ideas based on broad terms or keywords related to a specific website or even a specific page.
You can then filter the results by country and language, export them to an Excel or Google sheet or add them to your plan.
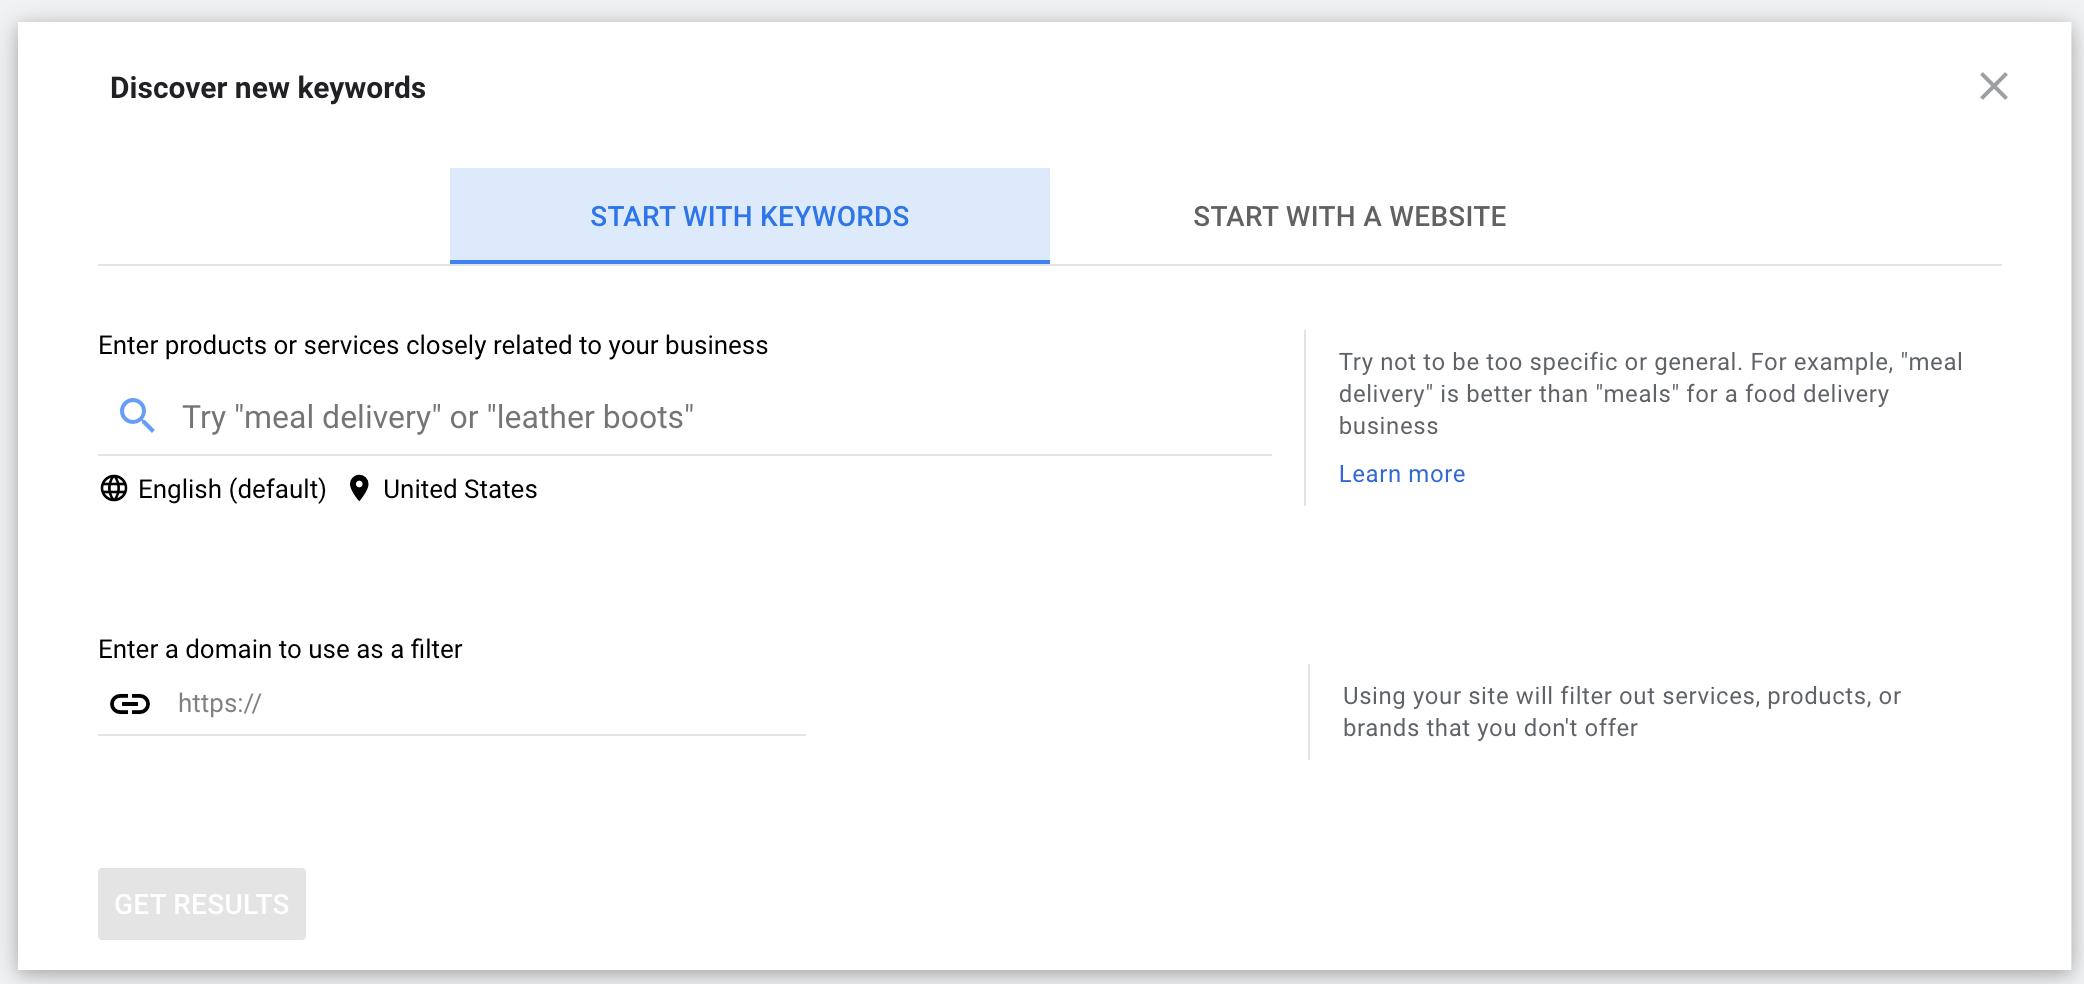
Let’s first examine how to use the ‘Start with Keywords’ feature. Here is an overview of the process:
- Think of a broad topic you want to get keywords ideas for.
- Type high-level keywords to the search box.
- Set your region and language.
- Use filters to find both seed keywords and long-tail keywords to use in your blog posts and digital marketing campaigns.
To make things easier for you, let me show you an example of how to use Google Keyword planner to do keyword research for your blog.
It’s the same process I’m using to find new SEO Keywords to target in my blog.
Start by adding keywords representing your chosen topic. Don’t go too specific or too broad. In my case, I’ve added keywords related to the SEO niche.
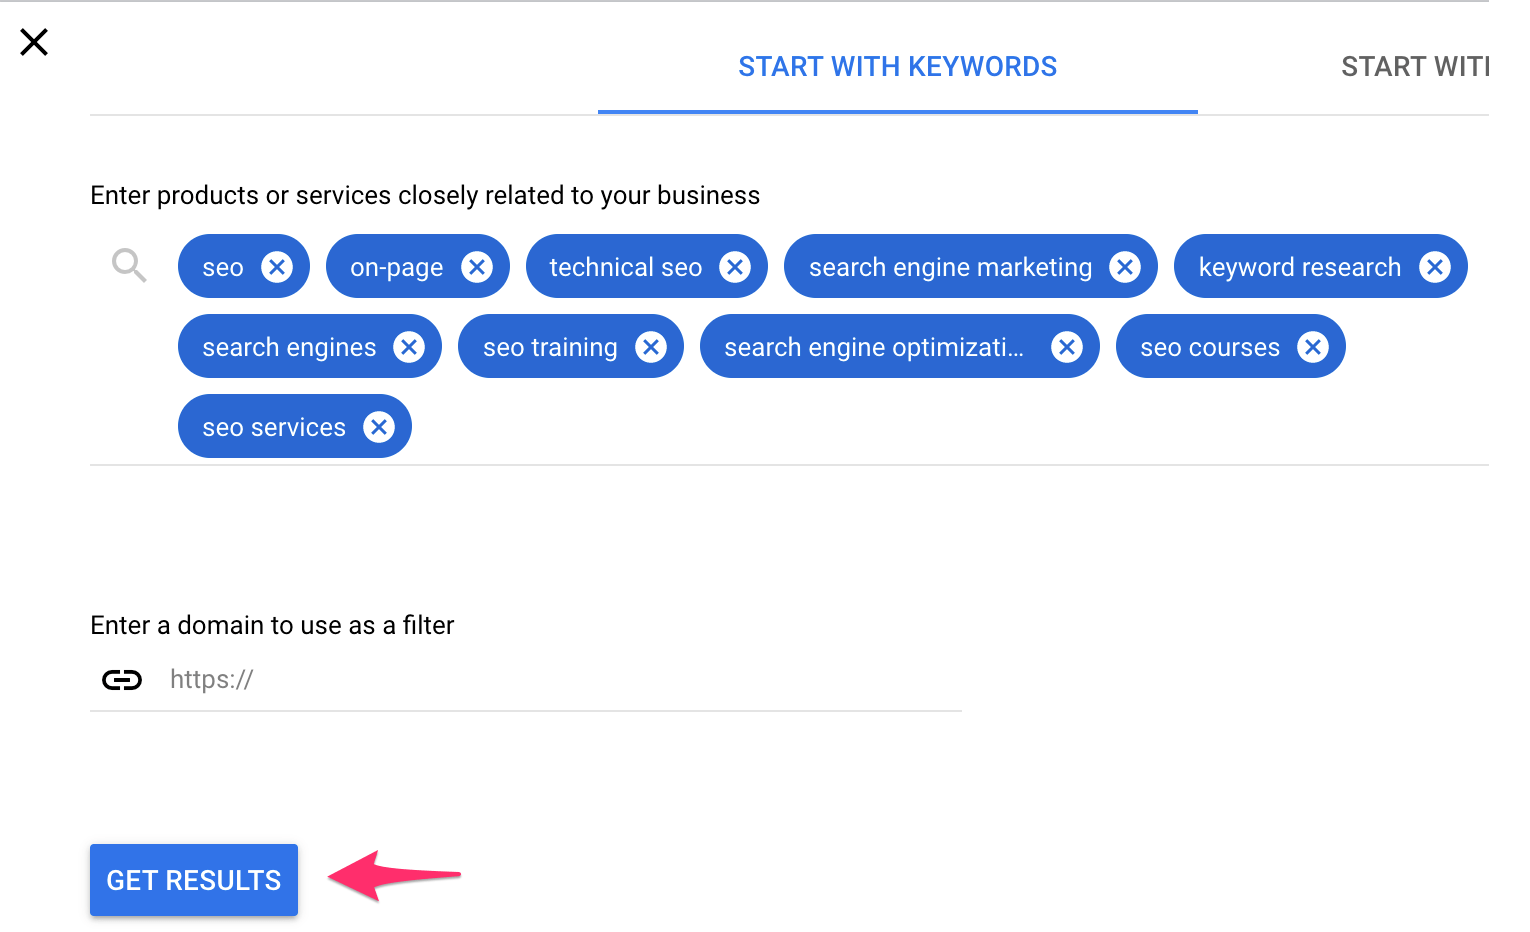
Note: You can only enter 10 Keywords at a time. To add more keywords you first need to finish with this research and select which keywords to add to your plan and then you can repeat the process to add more keywords or use the ‘Get search volume and forecasts’ option as we’ll see later on.
Once you click “Get Results”, you’ll be presented with a list of keywords with additional information:
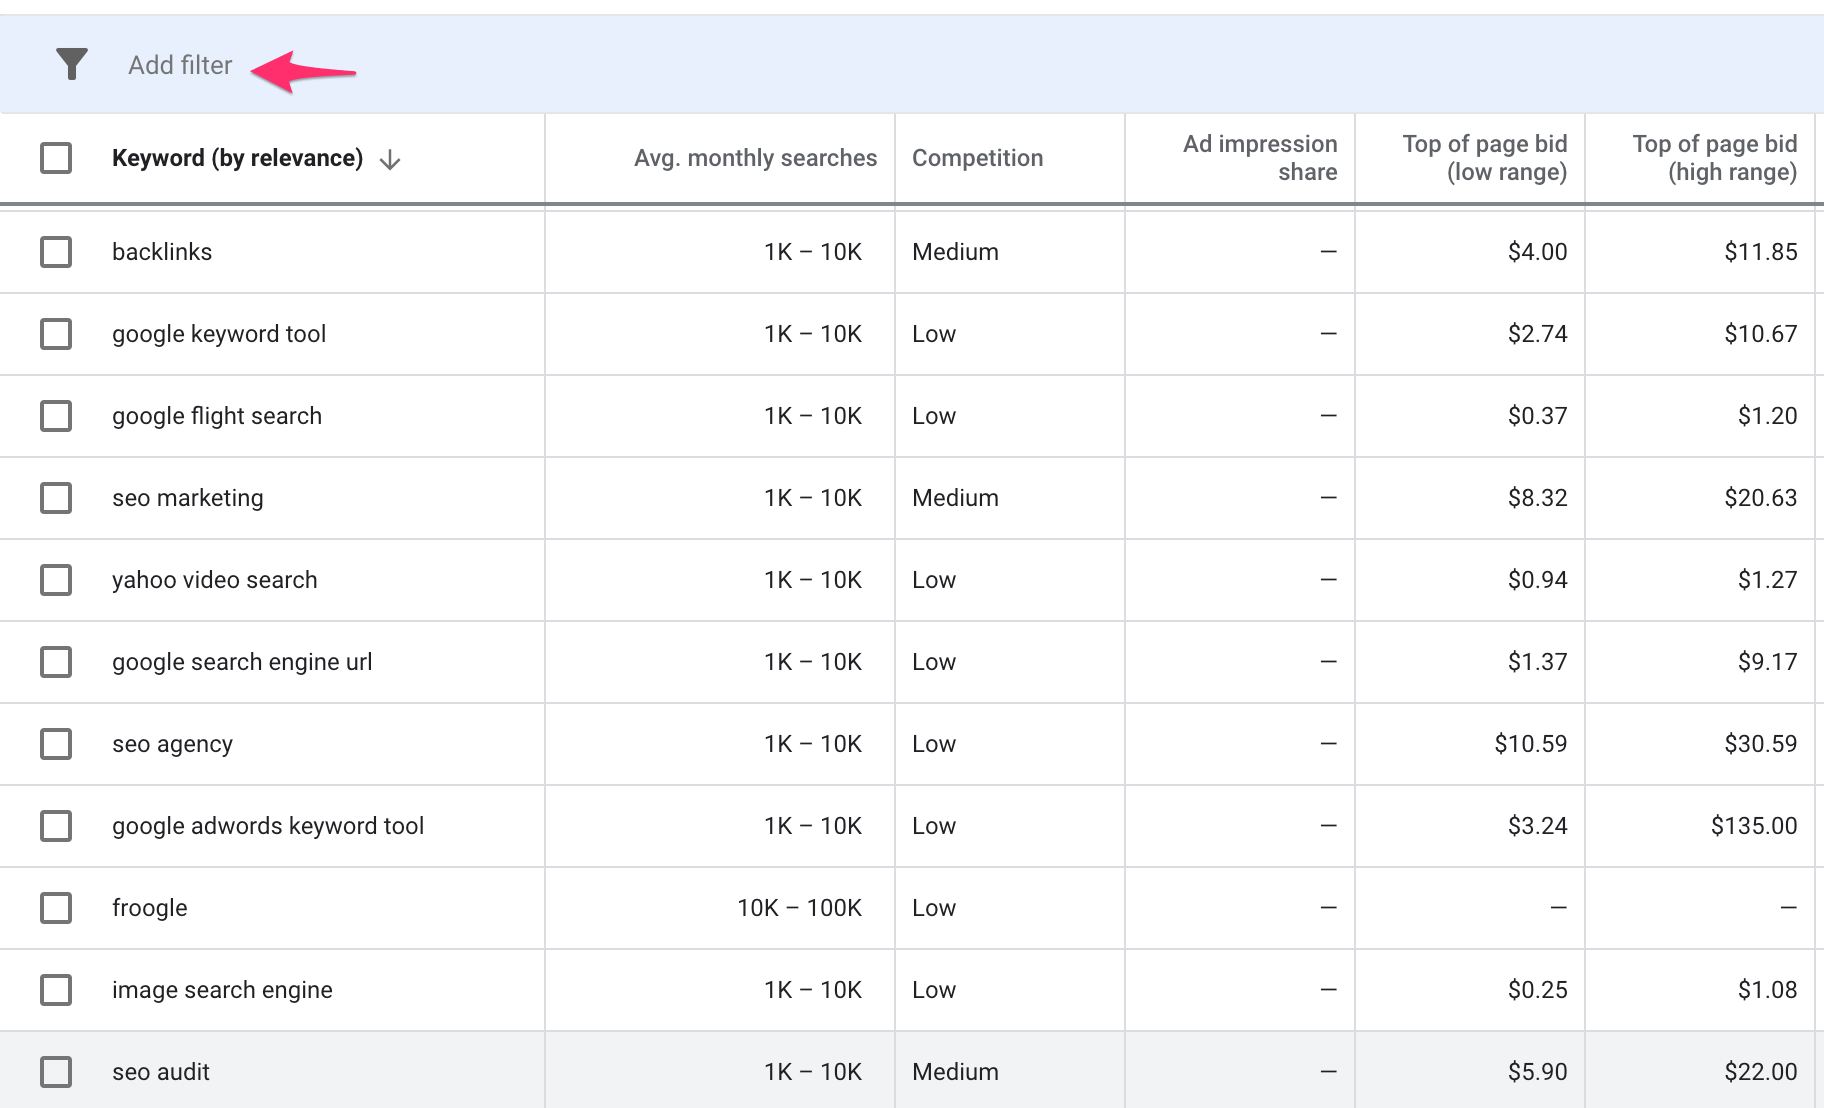
A few things to note while viewing the results:
You can click on any column name “Keyword (by relevance)”, “Avg. monthly searches”, “Competition”, etc) to sort the data in ascending or descending order.
The “Competition” column refers to how competitive ad placement is for a keyword and NOT to how easy is to rank for this keyword in organic search. This is different than the ‘Keyword Difficulty” column you’ll find in other tools like SEMRush or Ahrefs. So, for SEO purposes you can ignore this column.
The “Top of page bid (low range) and “Top of page bid (high range)” columns show how much you will pay per click if you target the particular keyword in your paid ads. While this is primarily for PPC campaigns, as you’ll see below (Step 3), it can be used for SEO purposes as well.
The ‘Average Monthly Searches” shows the monthly search volume for a particular keyword. This data is based on historical data coming from Google. You’ll notice that the “Avg. monthly searches” column shows a range and not the exact search volume for the particular keywords, we’ll see later how to find a more accurate number.
Step 3: Refine keywords to exclude brand-related searches
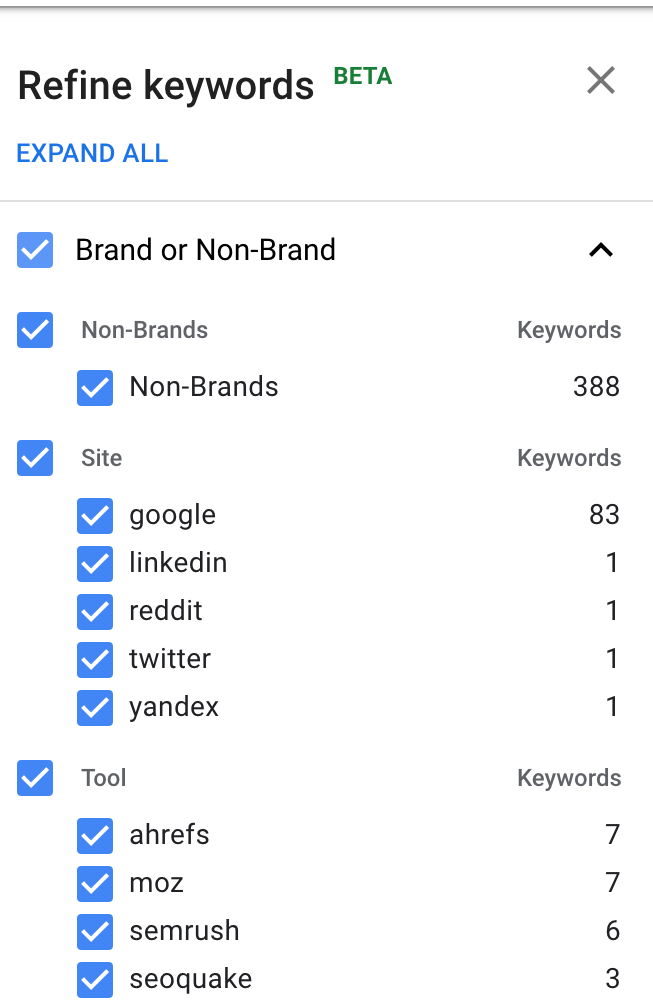
While viewing the results, you can click the “Refine Keywords” option to exclude certain categories of keywords from your list.

This is particularly useful if you want to remove keywords related to known brands like Google, competitor keywords, or even keywords that are no longer valid. For example, keywords that reference a period in the past.
To do that click the “Refine Keywords” button and navigate through the list. Uncheck the box for the keywords you want to exclude.
Step 4: Choose the right keywords for your SEO campaigns
After excluding brand-related and other keywords, you’re now ready to start selecting keywords for your SEO campaigns.
A few tips to help you with your decision:
One easy way to find valuable keywords for your SEO campaigns is to sort the keywords by clicking on the “Top of Page Bid (High range)” column.
The “Top of Page Bid (High range)” column shows you how much advertisers are willing to pay to secure a top position of their ads in the Google Search Results.
How is this related to SEO? If advertisers are paying a lot for a keyword, it means it has more value to them i.e. it can generate a lot of conversions.
These are great keywords to target with SEO because you know in advance that a top organic ranking for such a keyword, will generate sales and conversions for your business, ‘free of charge’.
For now, choose the broad keywords that are highly related to your website and business and move on to the next steps:
- To enrich your list with long-tail keywords
- Find keywords used by your competitors
- To get more accurate search volume for your chosen keywords
Step 5: Find long-tail keywords
Unlike other keyword research tools, the Google Keyword Tool does not allow you to filter the results by the number of words. This is a useful feature in other tools that makes it easy to find long-tail keywords that are highly relevant to your target keyword and easier to rank for.
You can follow this nice trick to do that with Google Keyword Planner.
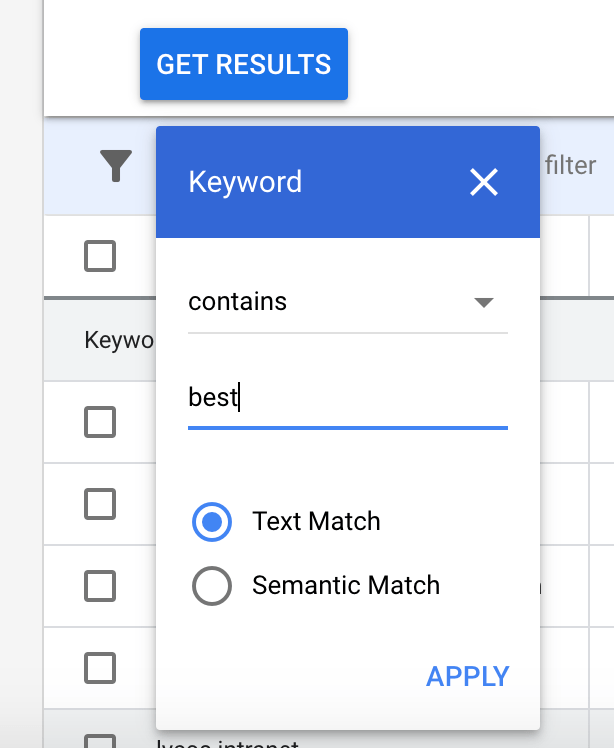
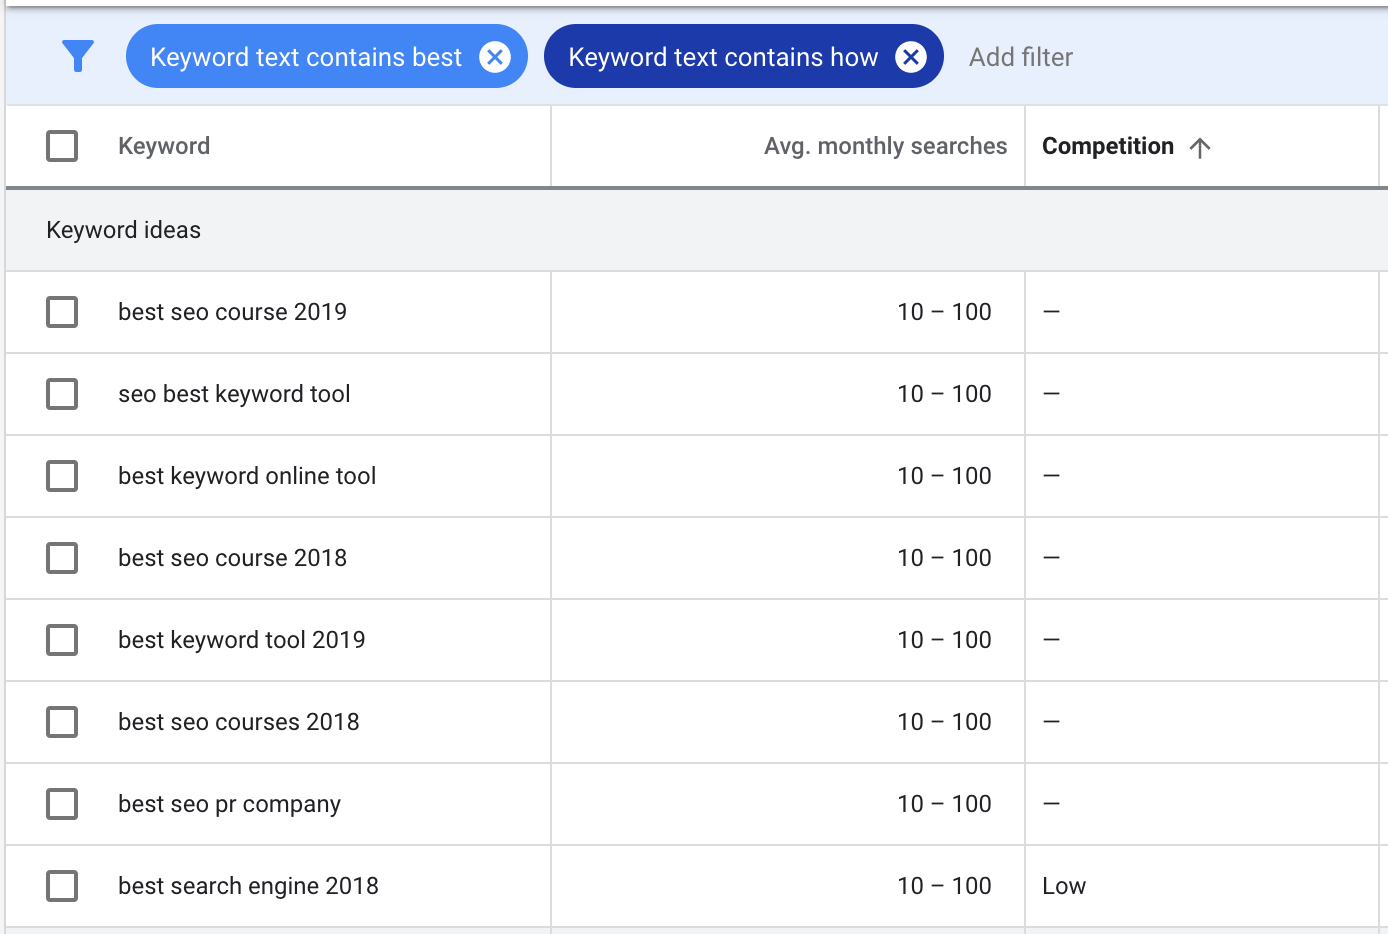
Long-tail keywords usually start with the words “best, top, what, how, who, where, why”. So, by creating a filter and adding those words, you can get a list of long-tail keywords.
To do this, click the “ADD FILTER” button and select “KEYWORD”. Type one of the above keywords and click APPLY.
You’ll see now that the results show you long-tail keywords that were not shown before. You can add multiple filters to get more results.
Sort the above table using the “Top of Page Bid (High range)” column and you’ll find some extremely valuable long-tail keywords to use in your blog posts.
Step 6: Find the exact search volume of keywords
I’ve mentioned above that a disadvantage of Google Keyword Planner compared to other keyword research tools is that it doesn’t show the exact search volume of keywords but a range.
To bypass this problem, follow these steps:
Select the keywords that make sense for your campaigns (can be ‘head’ or long-tail keywords) and click the “ADD KEYWORDS” button.
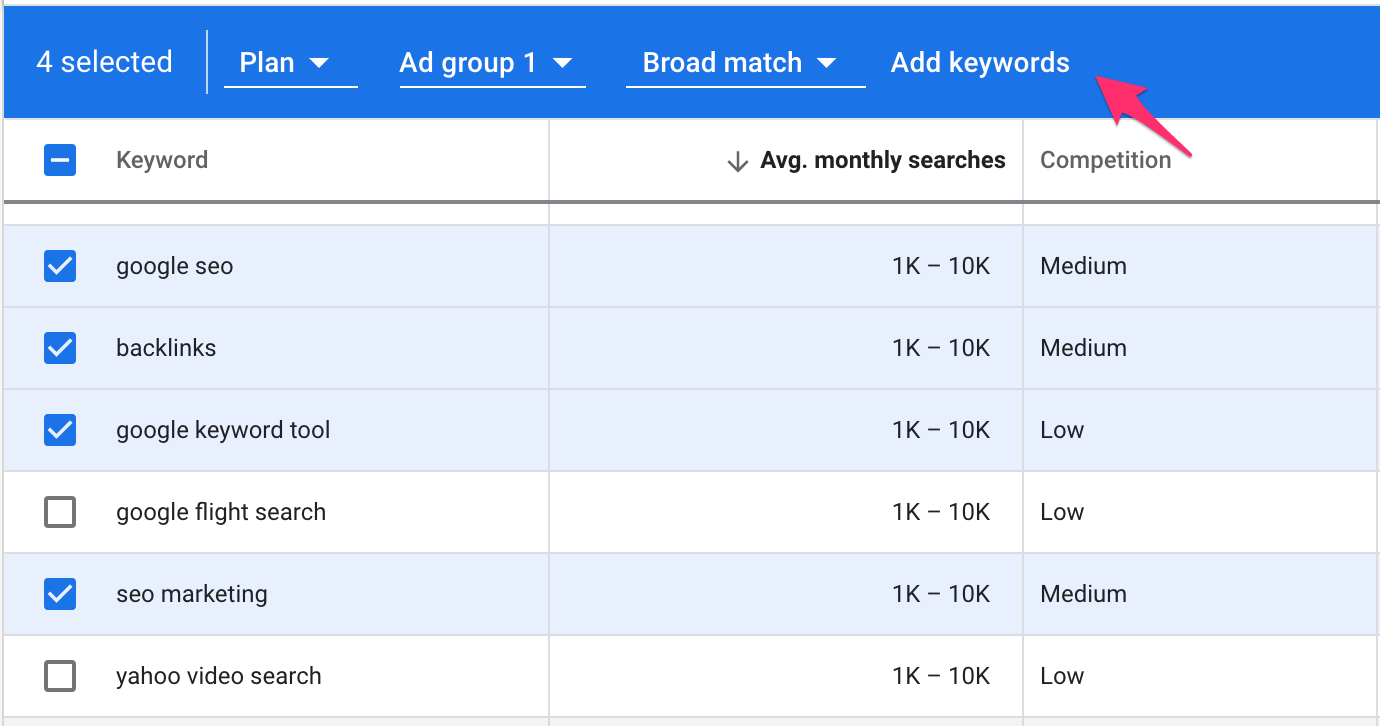
This will add the keywords to your “Plan”.
When you click either on the “Plan Overview” or “Keywords” from the left menu, you can now see the number of estimated “Impressions” for your selected keywords.
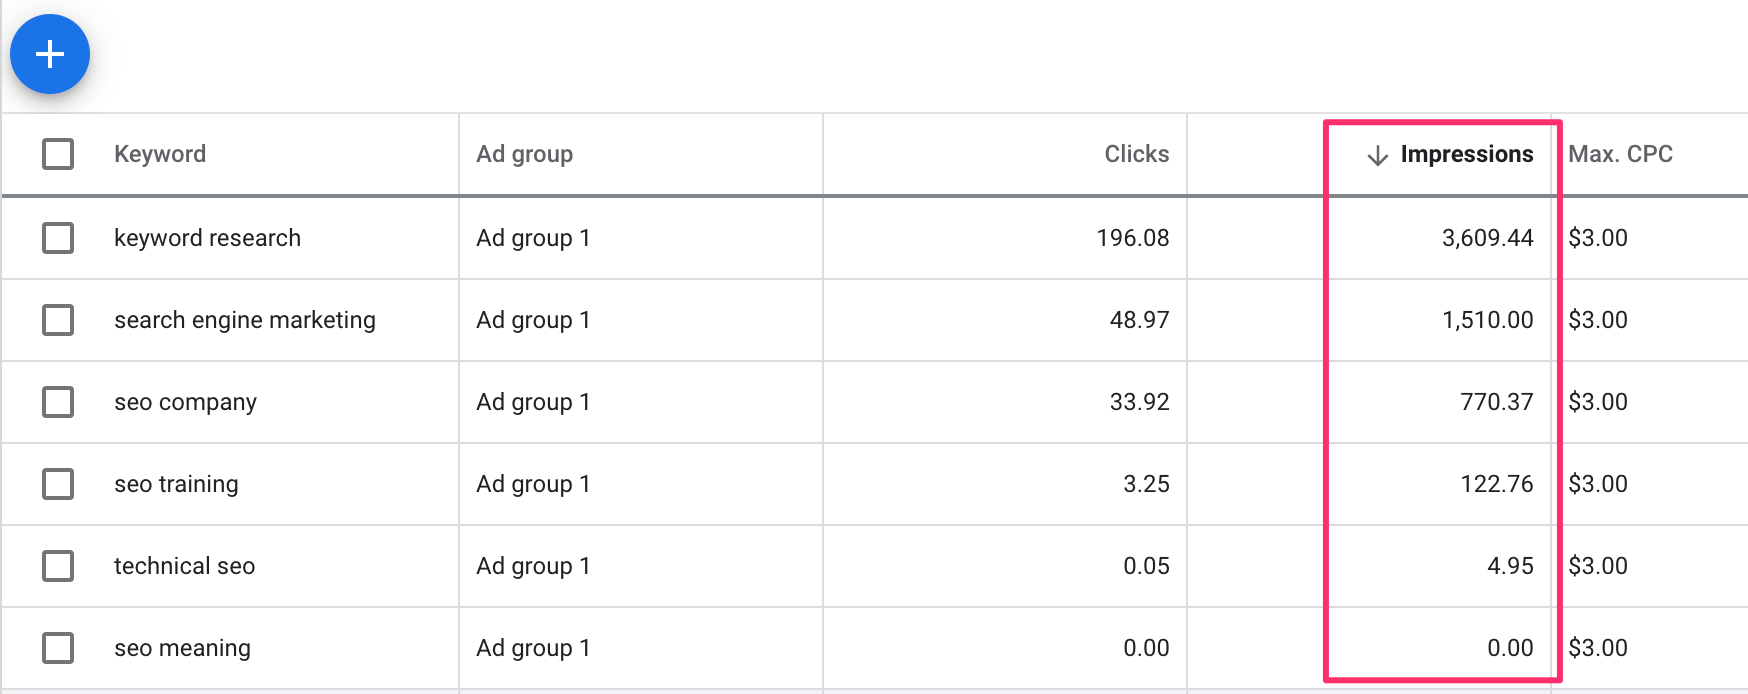
“Impressions” is the number of times your ads are expected to be seen in Google search results for that keyword – for the particular region and language.
To make your results more accurate follow these two steps:
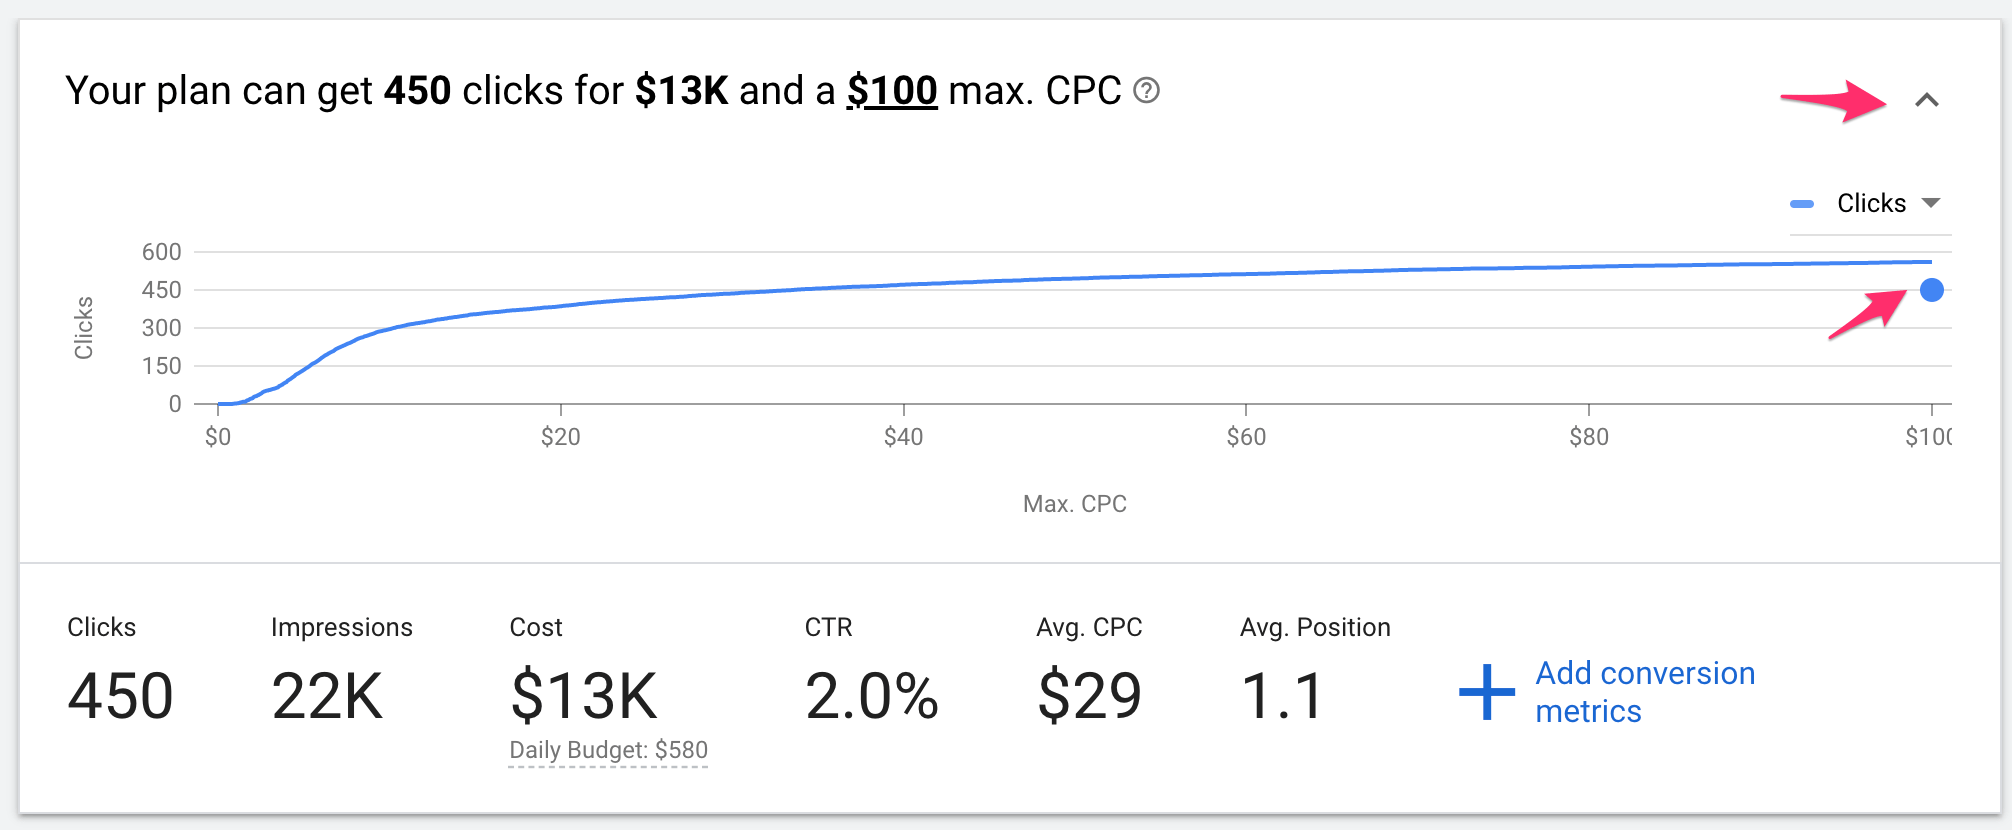
Click the little arrow on top of your plan to expand the plan details.
Move the blue dot that indicates the MAX CPC to the top right. This will refresh the results to show the MAX CPC for particular keywords.
Next, click the checkbox on the top left of the results, to select all keywords.
Click on “Edit Match Type” and set it to “Exact Match”.
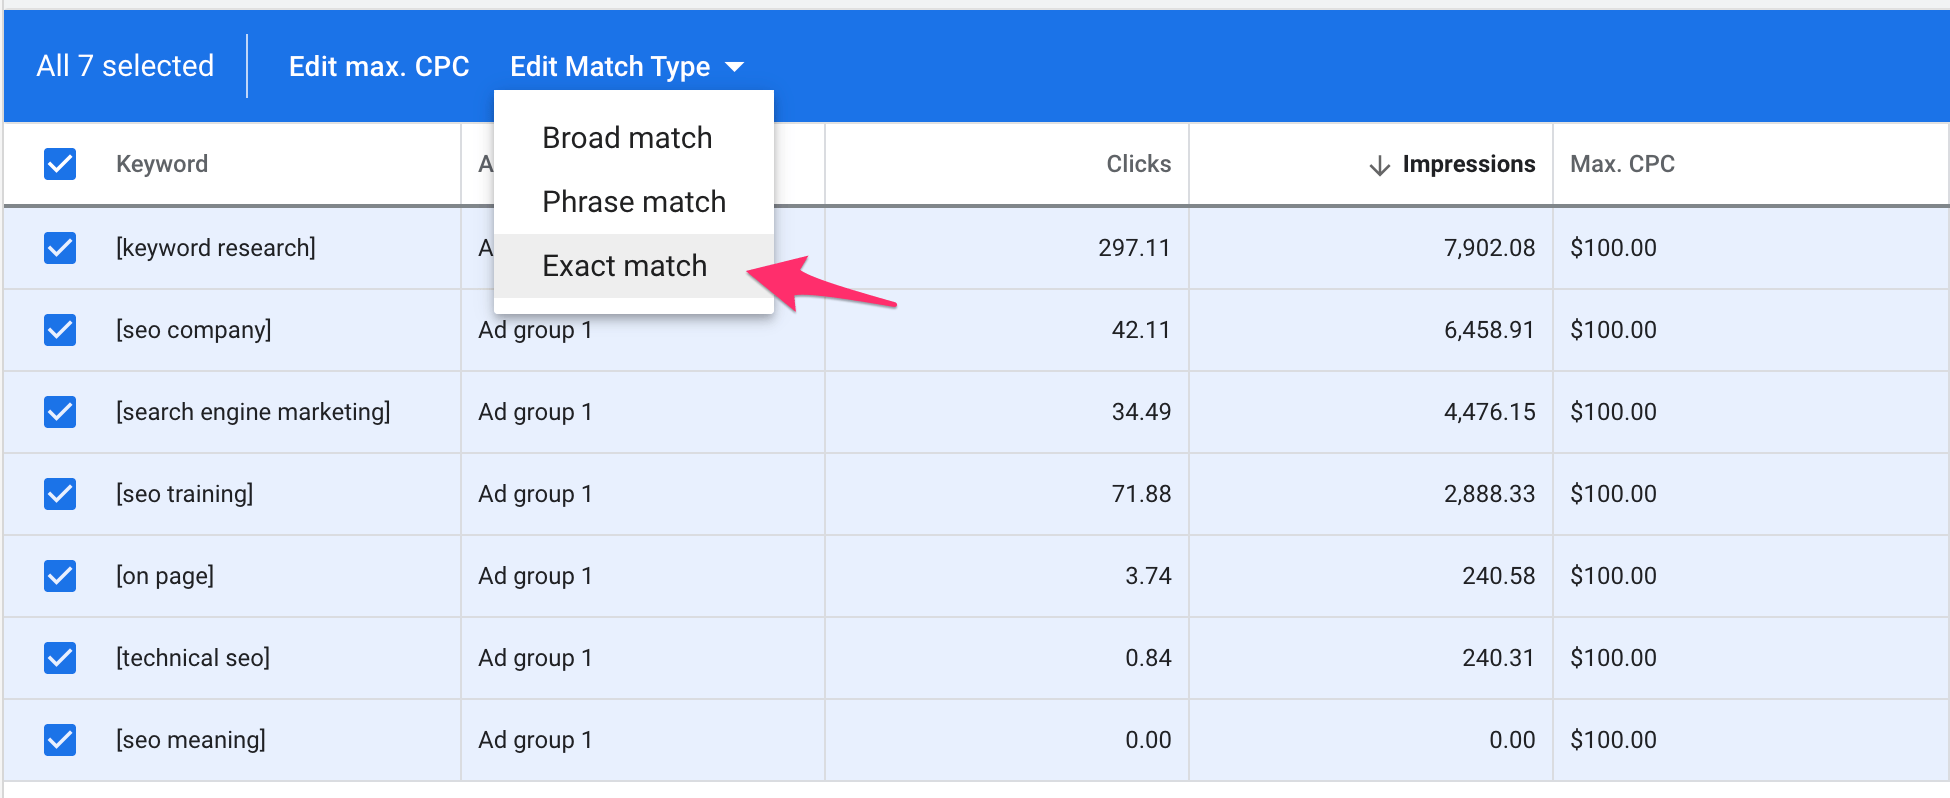
Now you can see the results have changed and show the average monthly search volume in a more accurate way.
Step 7: Find keywords your competitors are using
Another great feature of Google Keyword Tool is the “Start with a Website”. When selecting this option from the “Discover New Ideas” tool, you can get keyword ideas based on your own website or a competitor’s website.
Let’s see how this is done.
First, select “Keyword Ideas” from the left menu and then “Start with a Website”.

Enter a domain or page URL and click GET RESULTS.
For example, to find out keywords related to a website, you can enter the website’s domain in the search box, select “Use the Entire Site” and click “Get Results”.
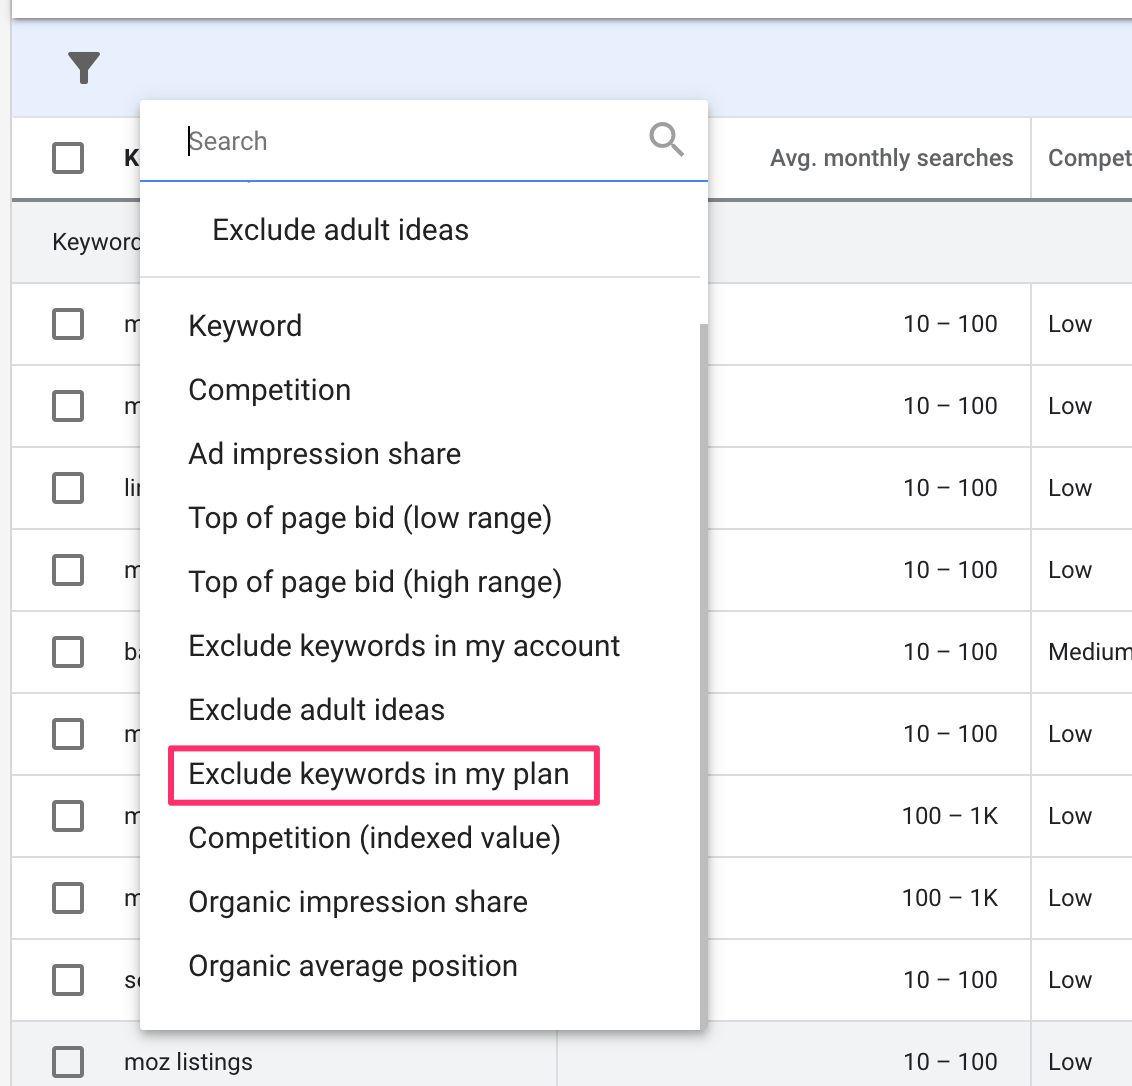
Next, you can add some filters to EXCLUDE brand-related keywords and search terms that are not of interest.
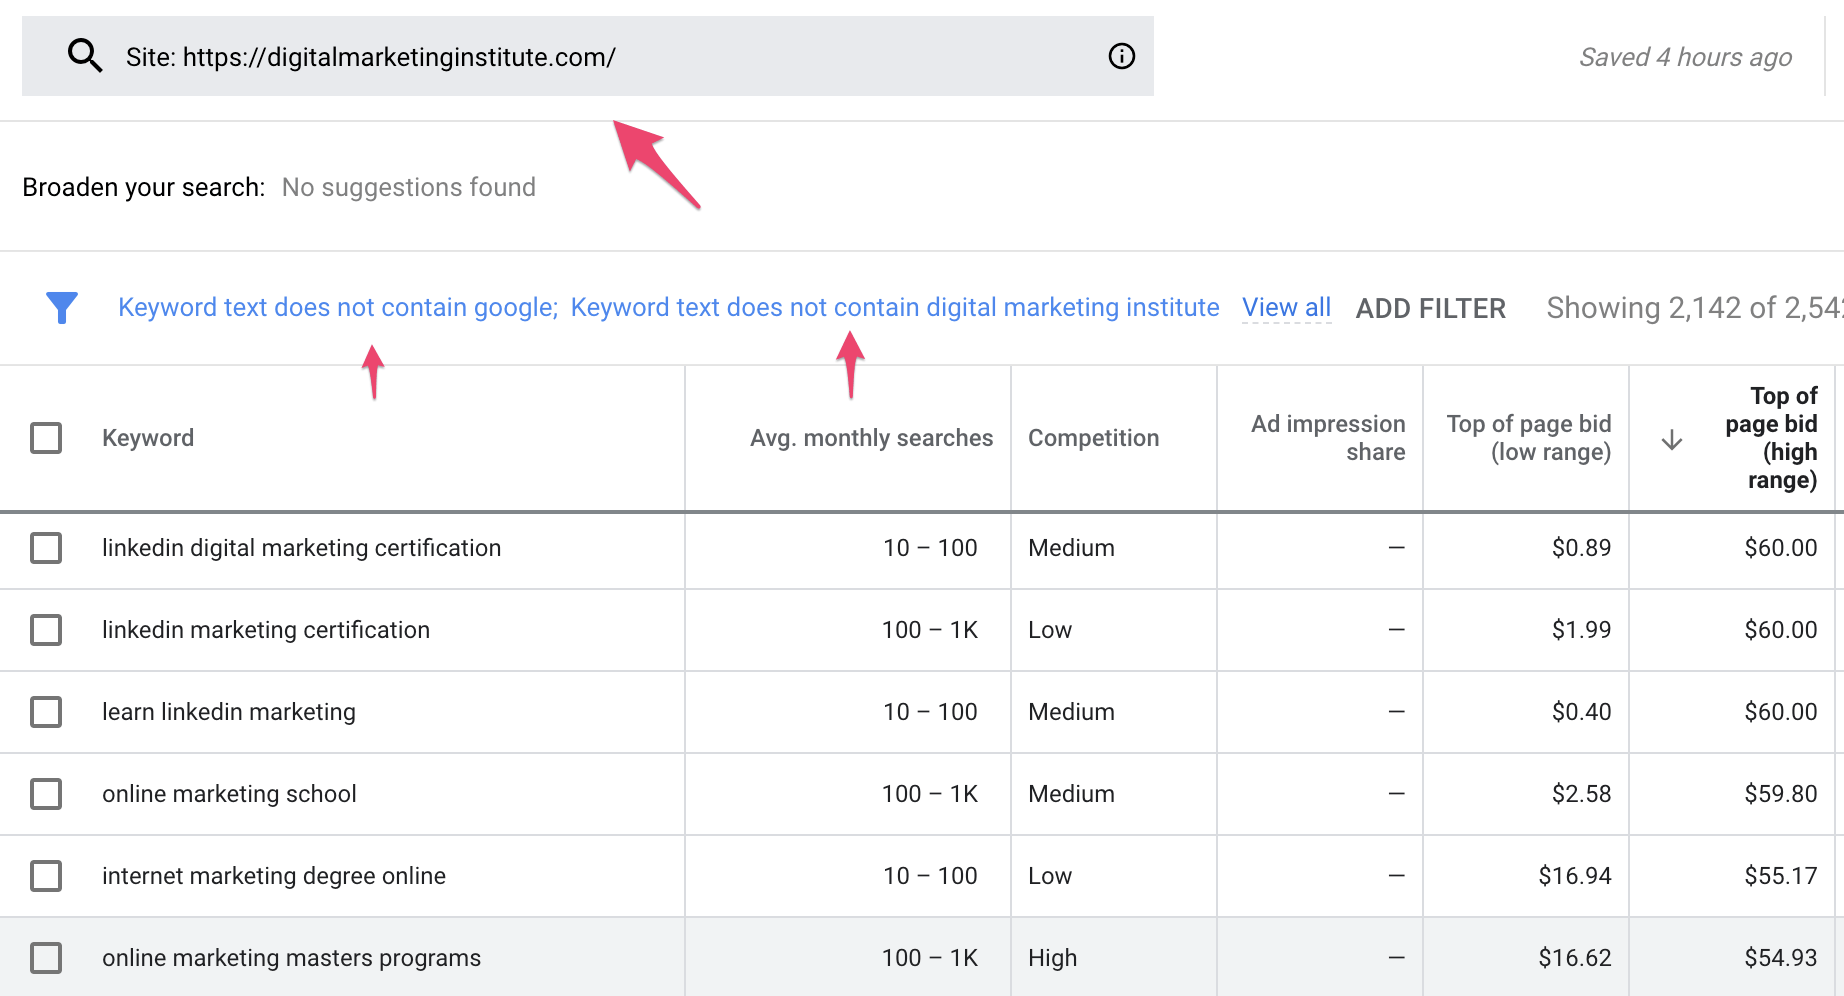
To find unique keywords that are yet known to you, filter the results to “Exclude” keywords already in your plan.
Step 8: Get the search volume for multiple keywords (bulk analysis)
Another nice feature of Google Keyword Planner is the “Get search volume and forecasts” tool. To open the tool click “Get search volume and forecasts” from the main menu.

Note: If you have the keyword plan open from the previous step, click on the top left “X” button to close it and go back to the first screen.
The “Get search volume and forecasts” tool does two things:
#1 – It allows you to see the search volume of a number of keywords at once. You can either type your words (one per line) or upload a list of keywords using a file. This lifts the limitation of 10 keywords at a time when using the “Discover new keywords” tool.
#2 – It gives you a prediction (forecasts) on how the keywords might perform in the future
To get started, type a few keywords in the provided search box and click “Get Started”.
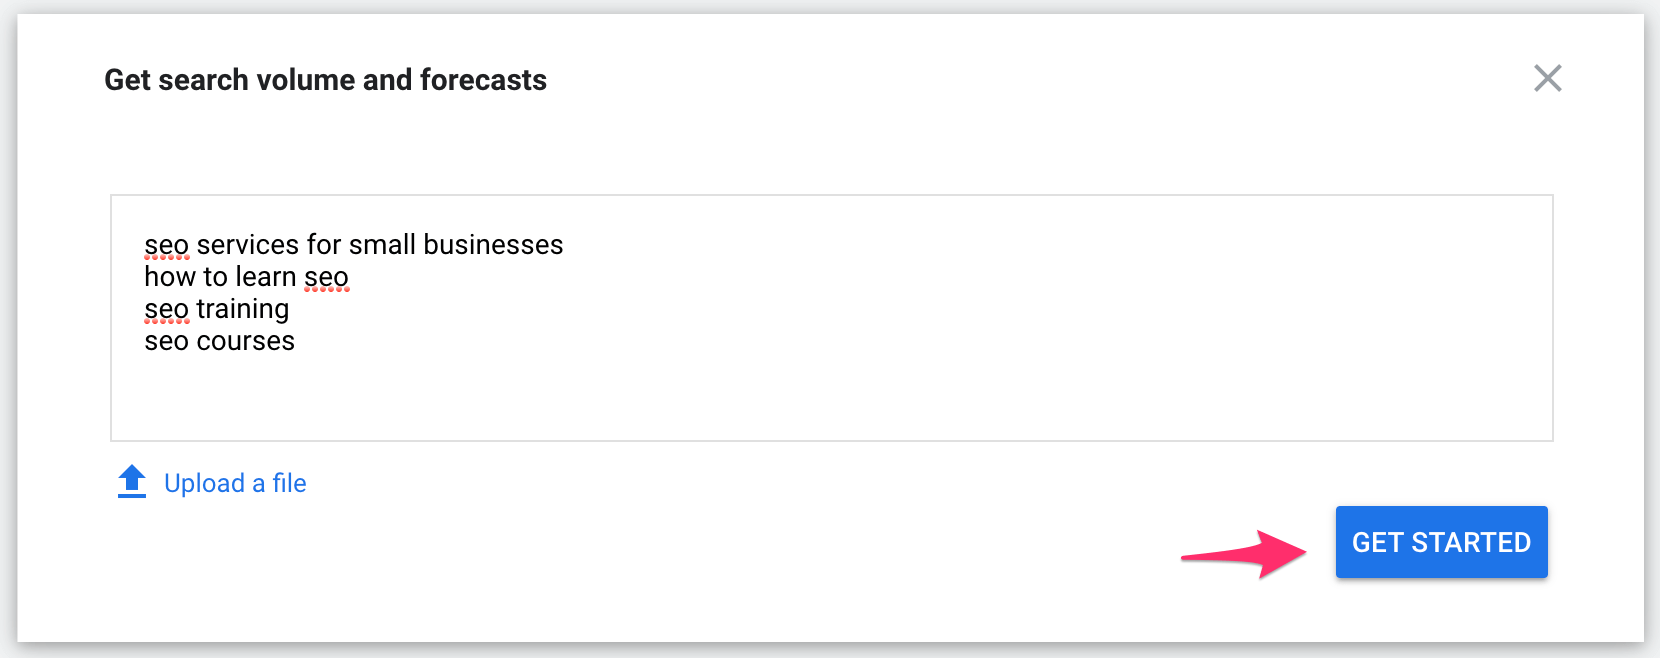
The results will appear in the same view as before and you can use all tips to filter the data and find which keywords to add to your projects.
Step 9: Find keywords for Local SEO campaigns
A unique feature of the Google Keyword Planner that can prove very useful for when doing local online marketing, is the ‘location’ filters available in every step of the keyword research process.
With the ‘location’ filter, you can see keyword data related to a particular country, city, or even specific postcodes.
Here is an example:
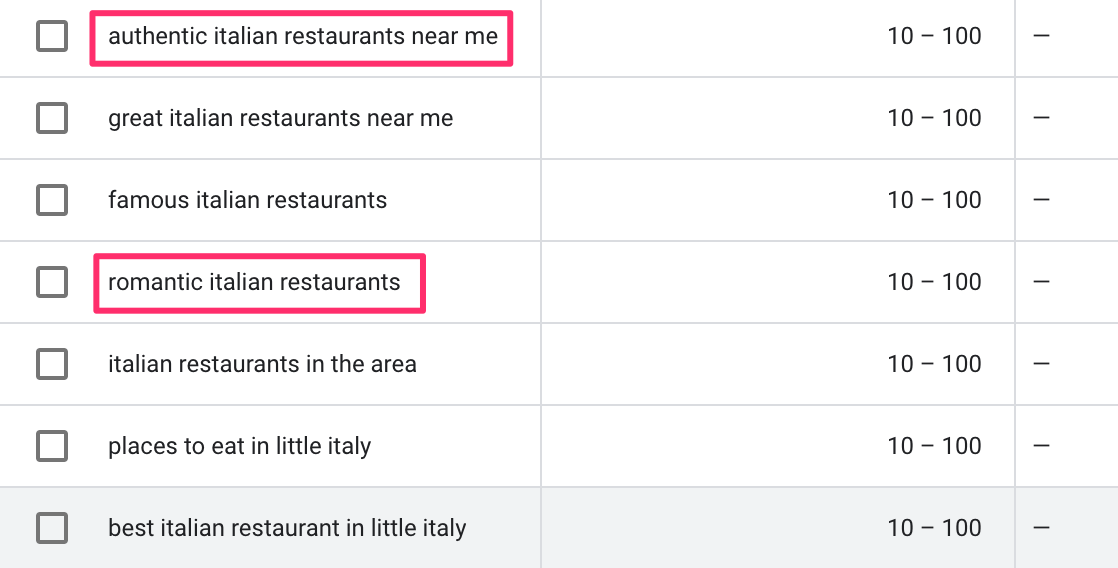
Let’s say that you want to find out what people search for related to “Italian restaurants” in a particular city.
You can start with the ‘Discover New Keywords” tool by entering the keyword “Italian Restaurants” and then select a city from the location option.
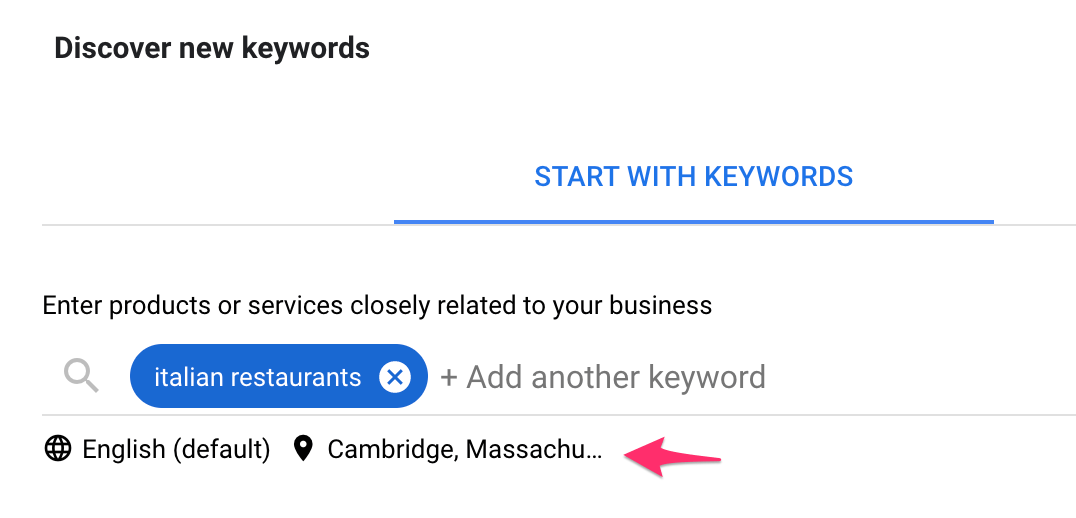
Click “Get Results”, select the keywords, and add them to a new plan.
Go to “Plan Overview” and you can see a breakdown of the searches by “Top Postal Codes”.
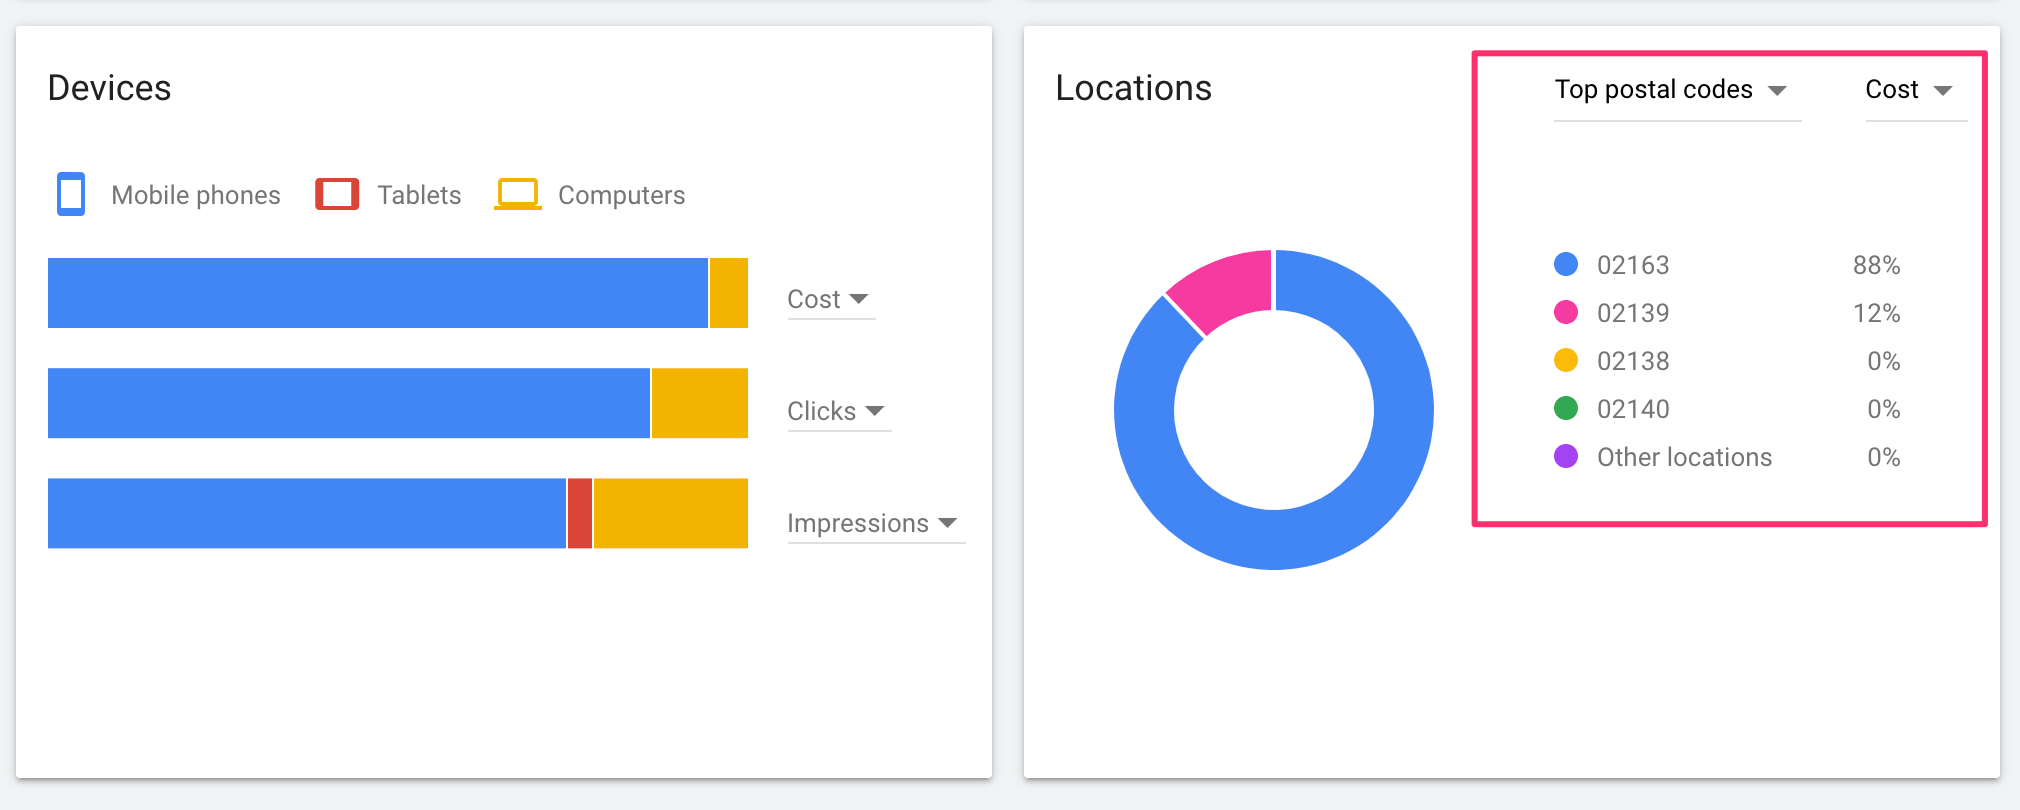
Don’t forget that you can also set the MAX CPC bid and Keywords as EXACT MATCH (like we did before), and start using filters to find keywords to optimize your website for local SEO or great ideas for blog posts.
Step 10: Export your keyword data to an Excel file
Every time you perform keyword research and add keywords to a Plan, this is saved in DRAFT mode in your account.
When you log in again to Google Keyword Planner you can select one of your draft plans and continue your work.

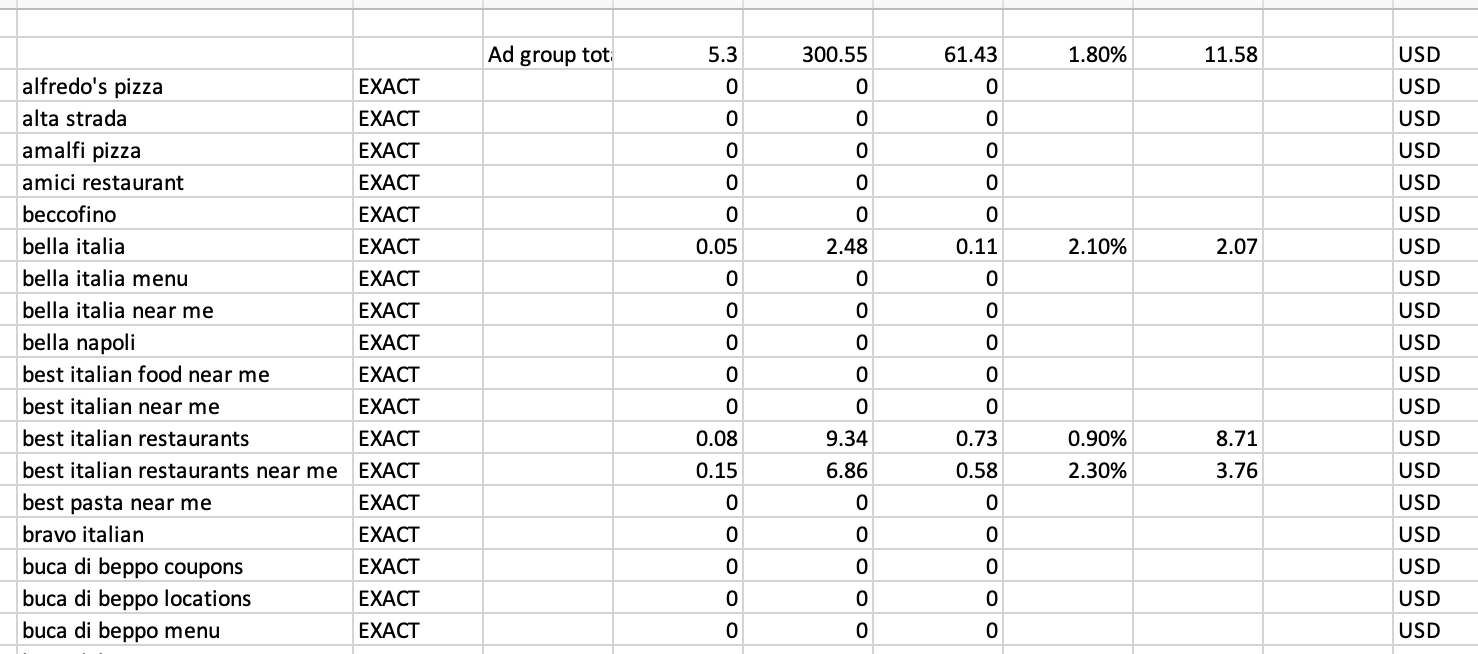
You can optionally export your keyword list in a .CSV file to use with Excel or directly to a Google Sheets file. You can do this by clicking the “Download button” at any stage of your research.

When downloaded as a .CSV and opened with Excel, you get all your data in a spreadsheet. It looks like this:
Key Learnings
The Google Keyword Planner is a very powerful tool with a number of great options. It’s free and the data comes directly from Google which makes it a reliable source of information.
It doesn’t have all the features of other professional paid tools like ahrefs and semrush but still, it’s a tool that every digital marketing professional should know how to use.
As you have read in this tutorial, once you get an idea of how it works, it’s easy to navigate around and perform keyword research for both SEO and PPC purposes.
Let me know in the comments if you have any questions or comments on how to use Google Keyword Planner.


Thank you Alex for this article as I am a beginner I don’t have much money to buy premium SEO tools for keyword research.
Hello, this was very informative, well explained tutorial. I look forward to sign up with google keyword planner. Thanks for sharing.
Thank You for this really informative post, and for sharing the best practices for doing effective keyword research. Happy to be following your blog for quite a time now, and quite beneficial in my digital marketing implementations.