To utilize Facebook’s powerful advertising capabilities, you need to install Facebook’s pixel code on your Website.
In simple terms, the pixel is the bridge between your website and Facebook. Without installing the Pixel, you won’t be able to measure the effectiveness and profitability of your Facebook campaigns.
So, if you plan to run any type of campaign on Facebook, the first step is to add the pixel code to WordPress and check that it’s working ok.
In this tutorial, you’ll learn how to create a Facebook pixel for your ad account and how to add the code to WordPress using a plugin or manually without using a plugin.
You’ll also learn how to configure some important pixel settings and how to test your pixel installation and confirm that it’s working as expected.
- How to Create a Facebook Pixel
- How to add pixel code to WordPress using a plugin
- How to add pixel code to WordPress manually (without a plugin)
- Configure Pixel Additional Settings
- How Test Facebook Pixel Code Installation
What is a Facebook Pixel?
The ‘pixel’ is just a piece of javascript code that gives Facebook the ability to track visits to your website, associate these with actions (web page visits, conversions, etc.) and Facebook accounts.
When you install the Facebook Pixel to your WordPress website, you will be able to measure conversions, build custom audiences, and optimize your Facebook/Instagram ad campaigns.
How to Create a Facebook Pixel
Login to your Facebook account and go to Ads Manager.
Click the menu (top left) and select “Events Manager”.
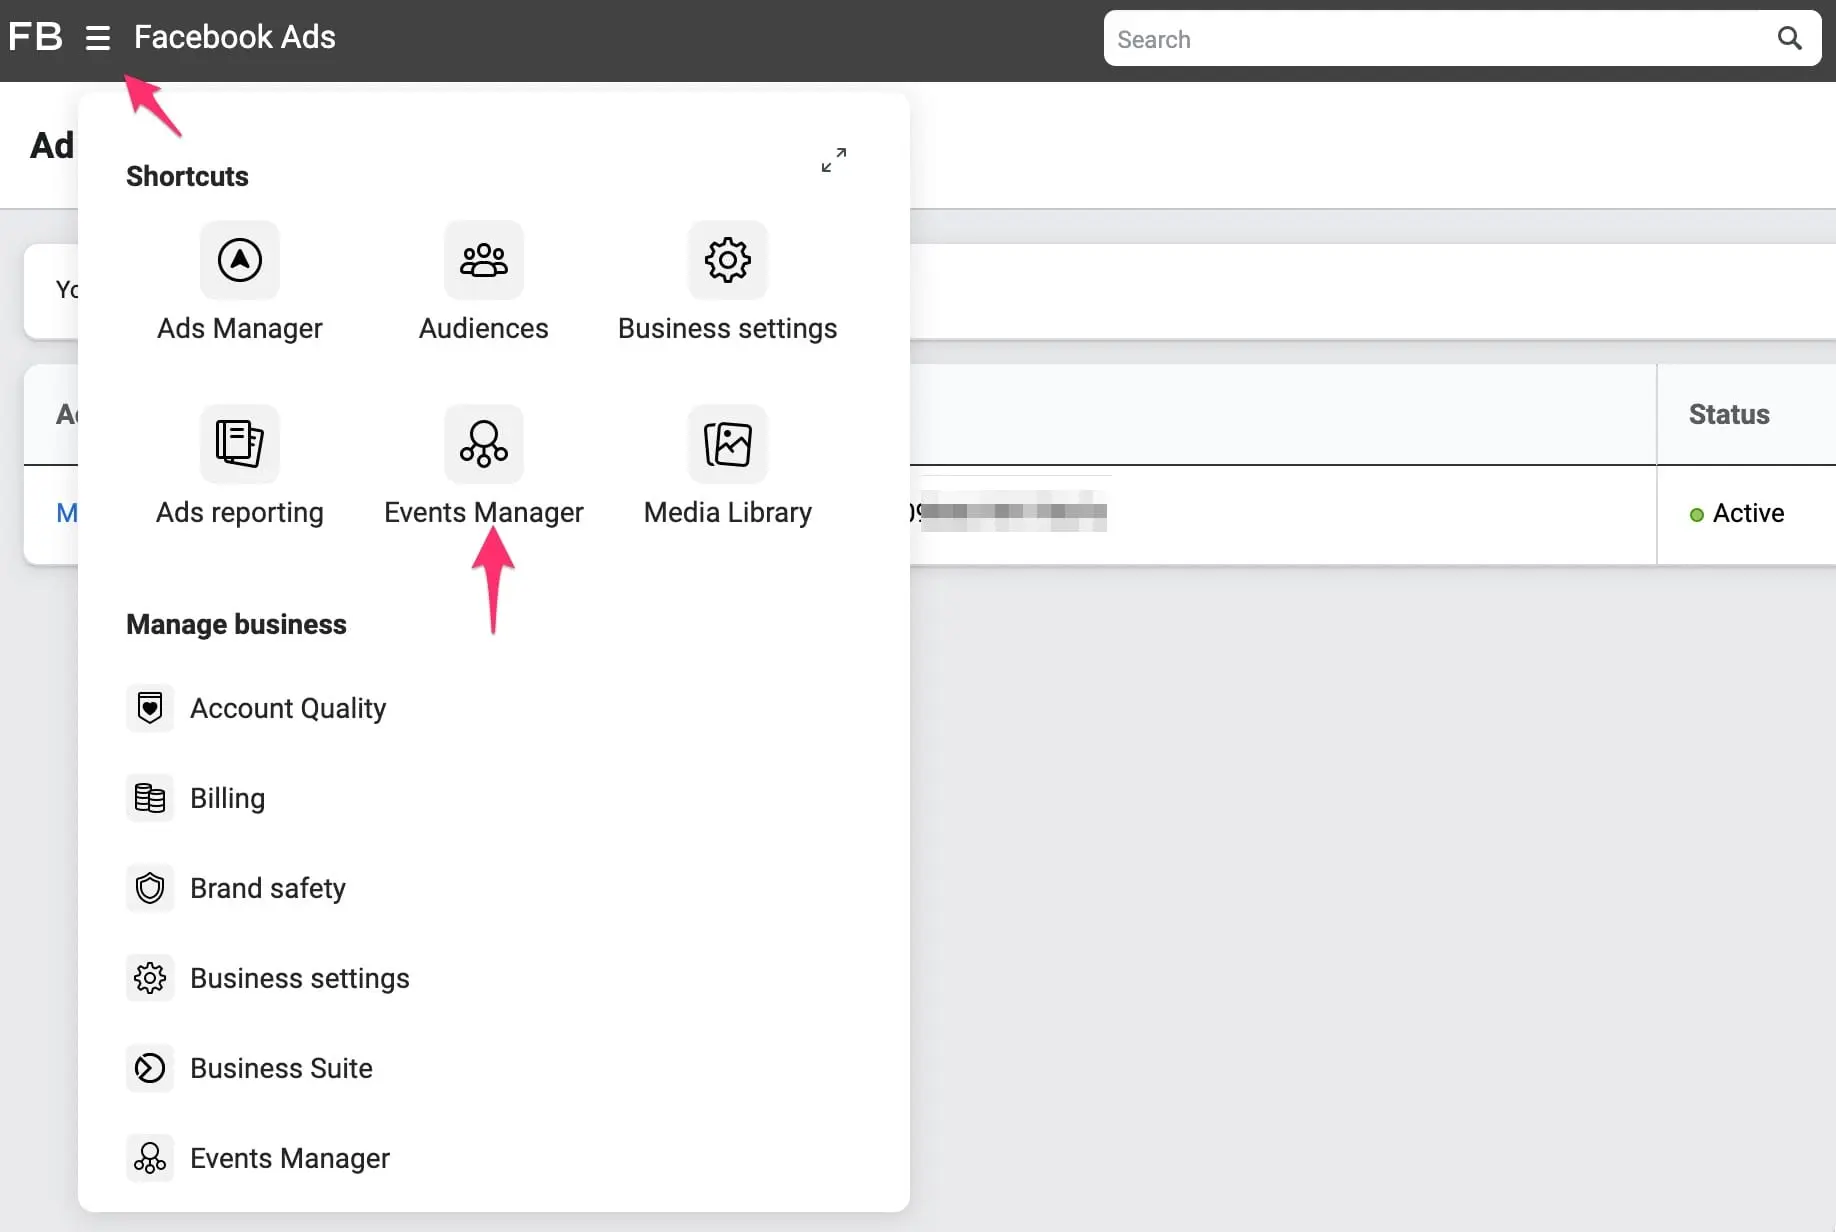
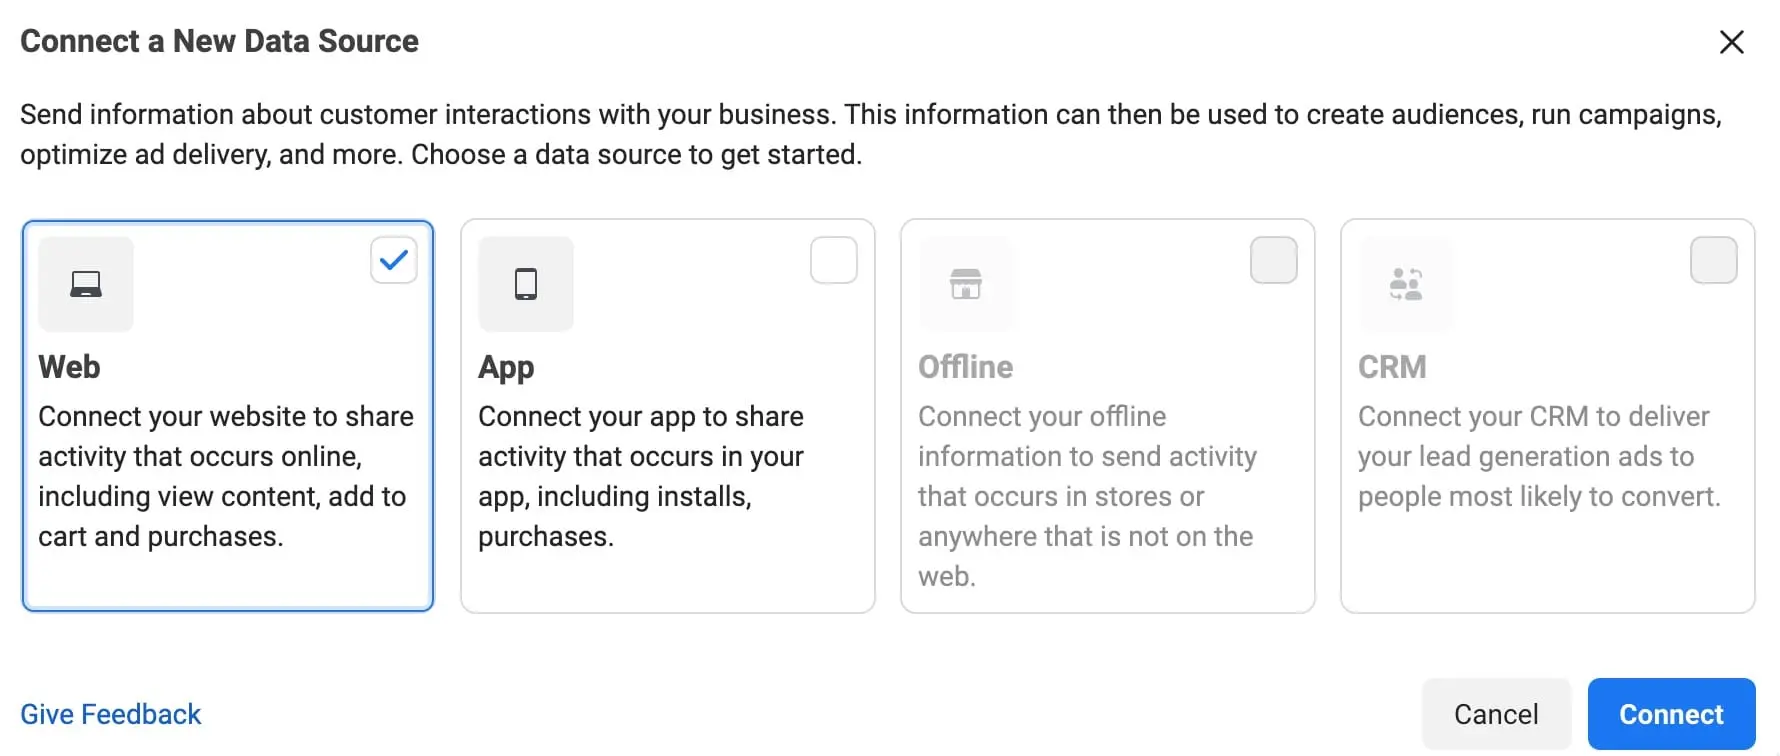
Click the button from the left sidebar and select “Connect Data Sources” from the menu.
Select “Web” and click the “Connect” button.
Provide a name for your pixel and click the “Create Pixel” button.
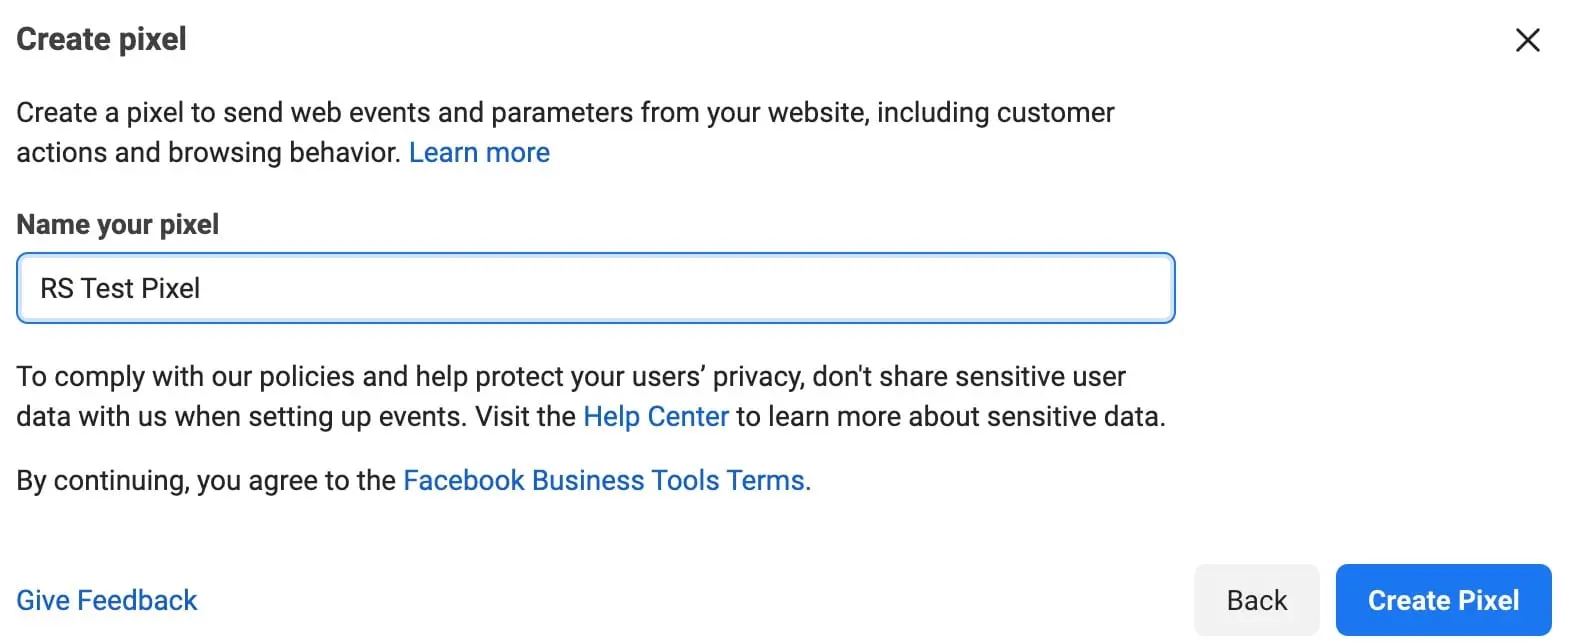
Congratulations! You’ve created a new Facebook Pixel.
The next step is to add it to your WordPress website using a plugin or manually.
How to Add Pixel Code to WordPress Using a Plugin
One of the best ways to add the Facebook pixel code to WordPress is using a plugin.
Facebook has an official plugin for WordPress but unfortunately, it has a lot of bugs, and it is challenging to set up correctly. So, the best free alternative plugin is PixelYourSite.
With PixelYourSite, you can install the Facebook pixel to your website and take advantage of all pixel features (including the newly released Conversion API), in just a few steps.
Let’s see the steps to follow:
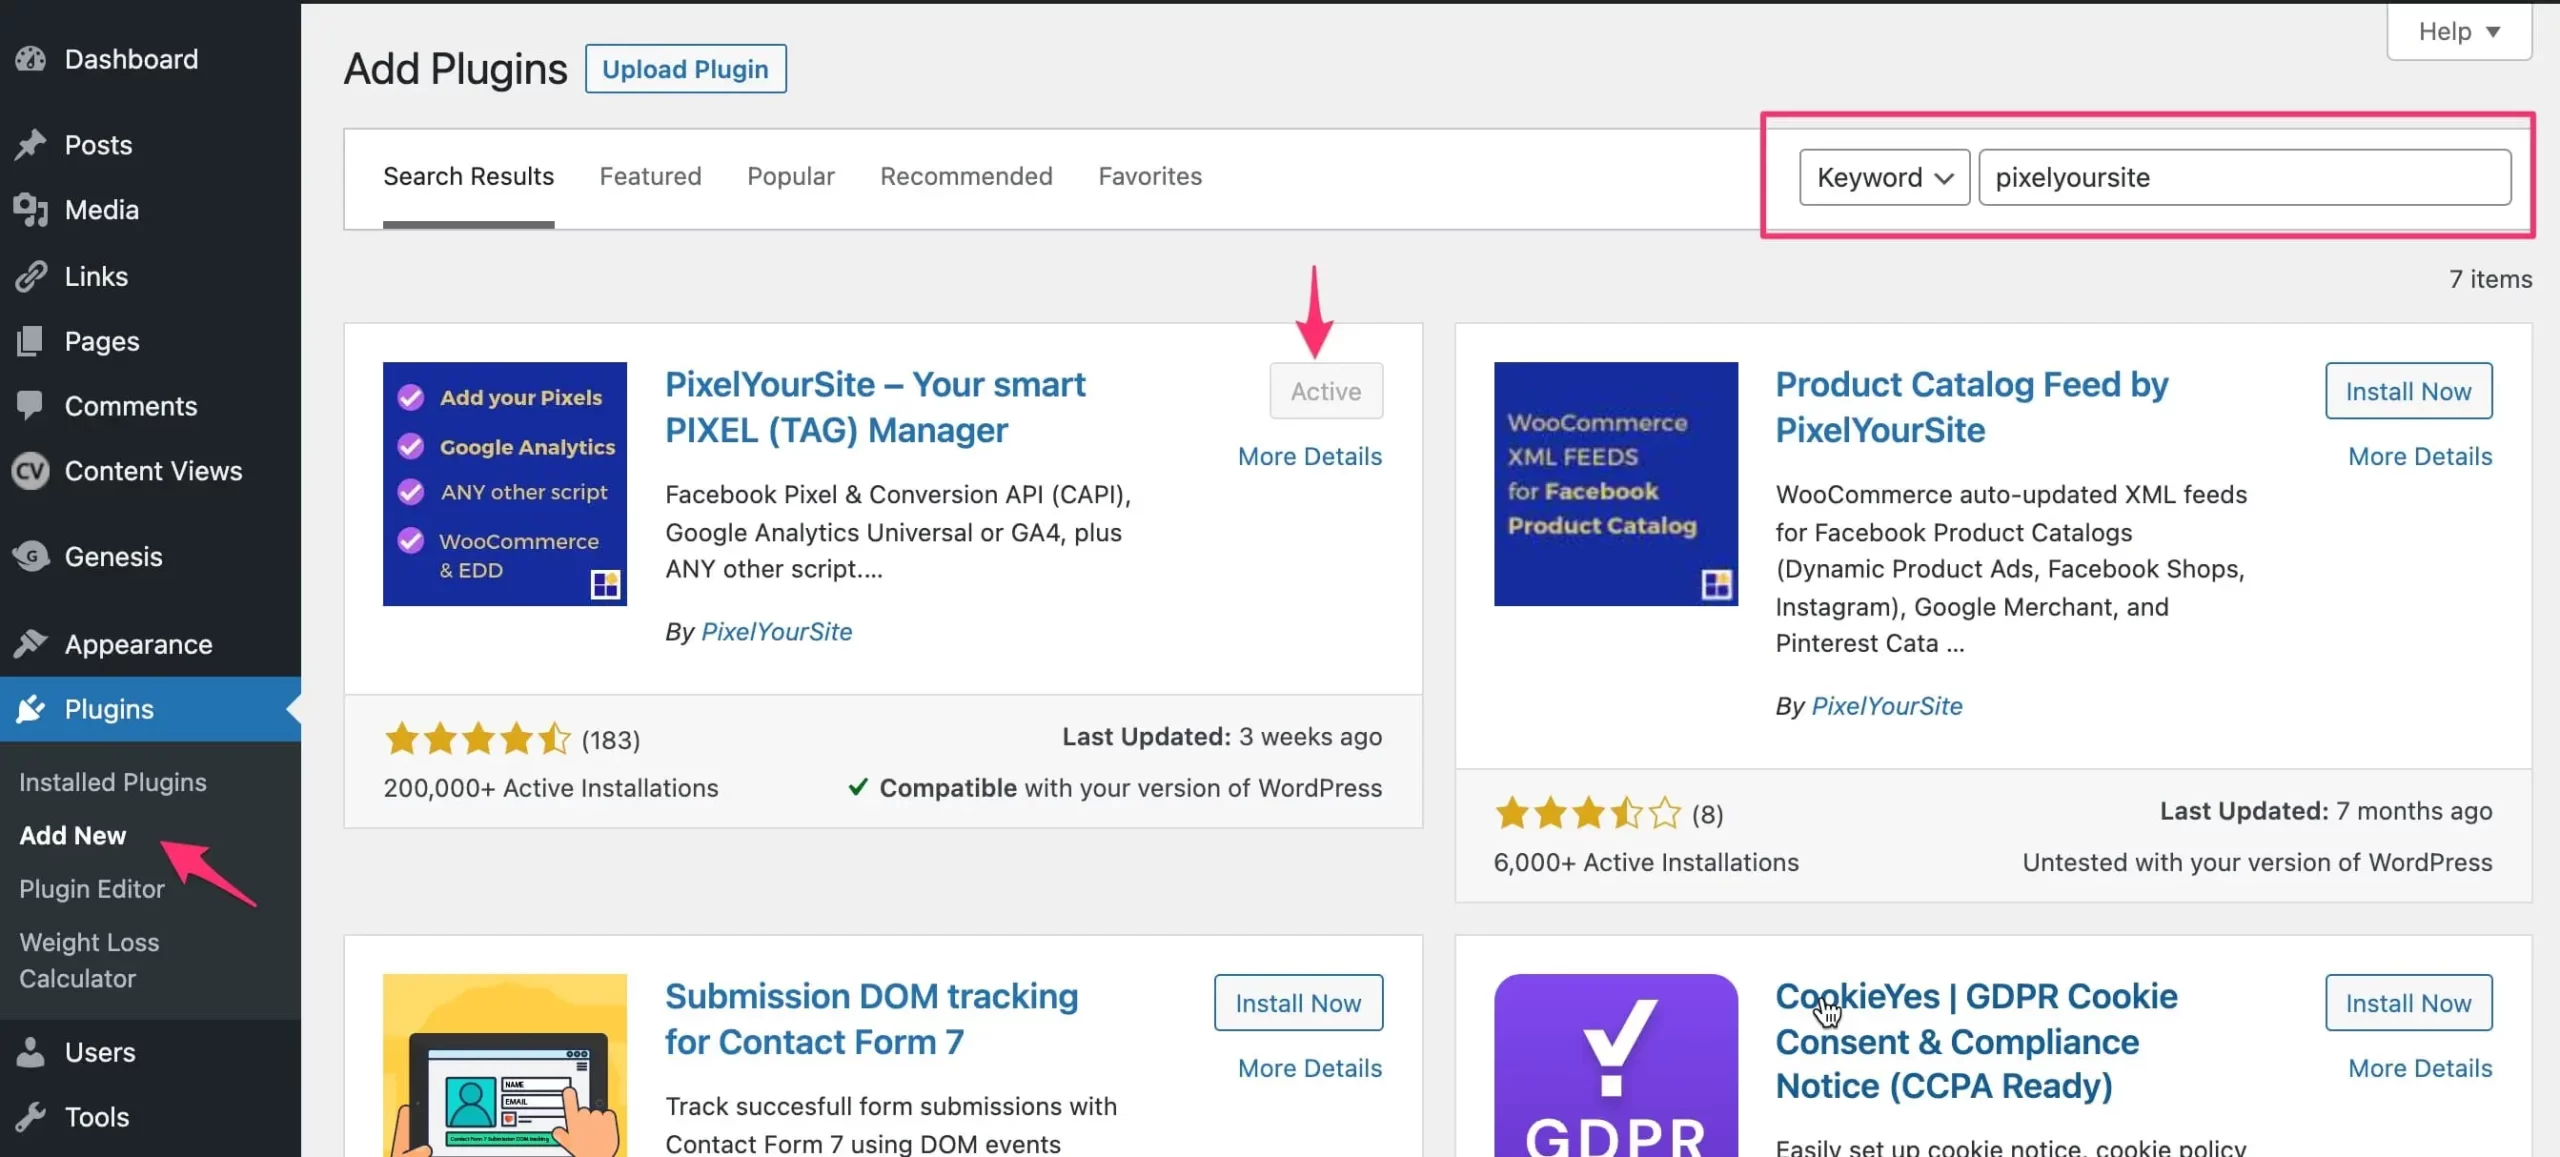
- Log in to WordPress and select “Plugins” and then “Add New” from the left menu.
- Search for “pixelyoursite” and locate the “PixelYourSite” plugin. Normally, it should be the first one on the list.
- Click the “Install Now” button to install the plugin.
- Once installed, click the “Activate Now”.
The next step is to configure the plugin to connect your website with Facebook.
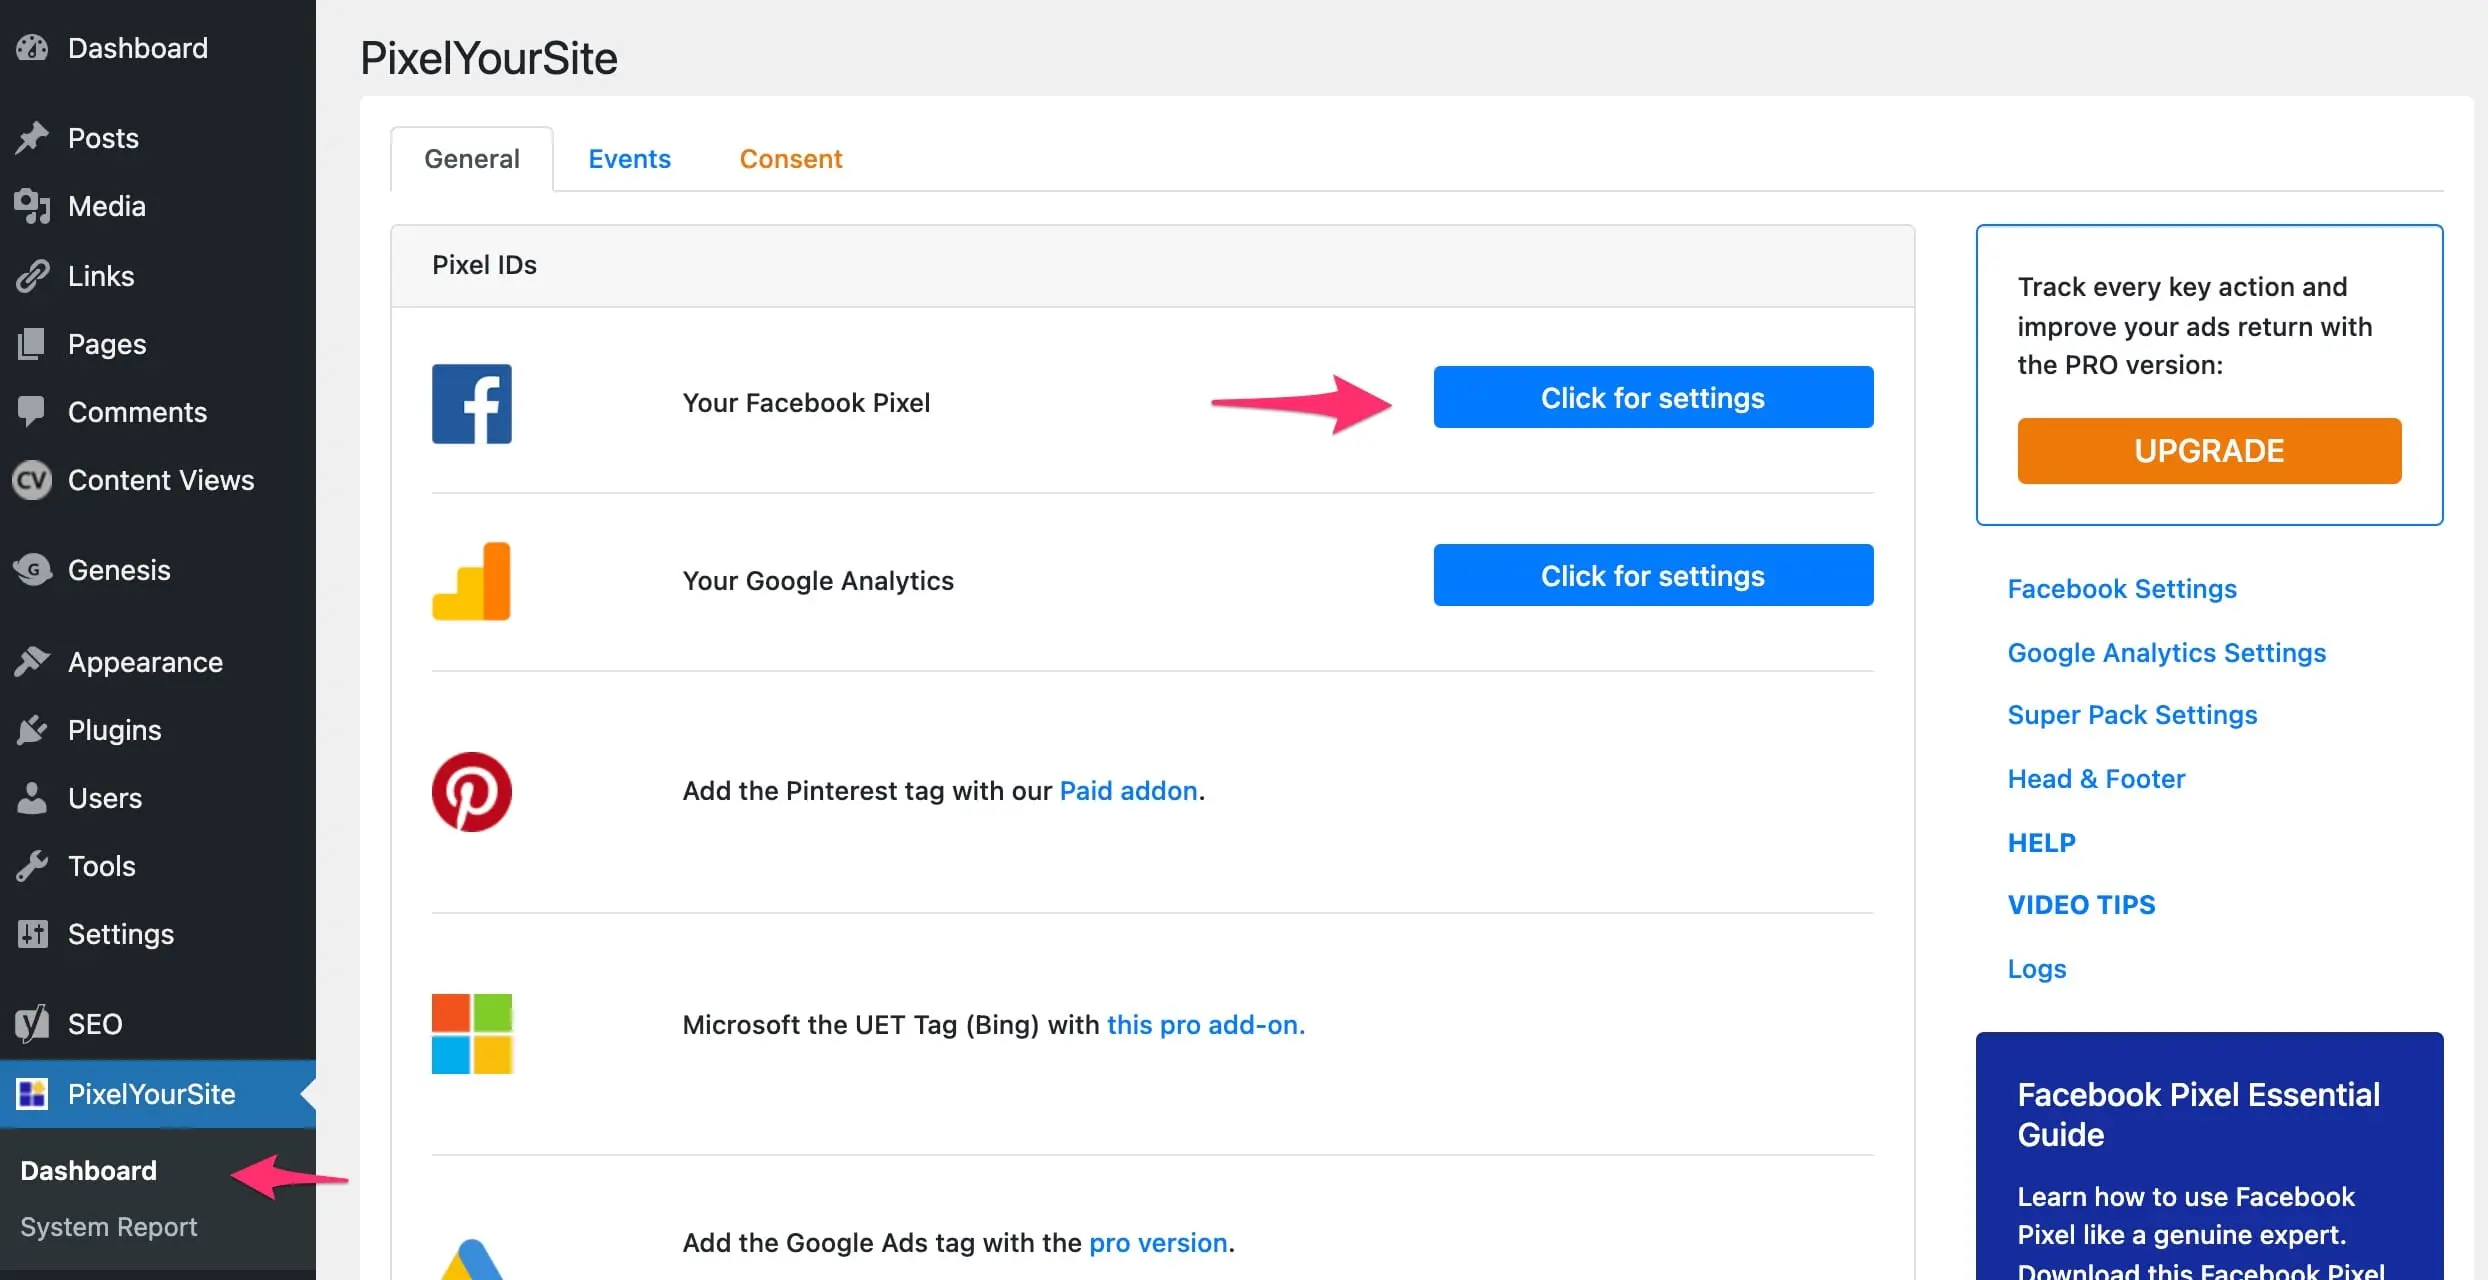
- Locate “PixelYourSite” on the left menu and select “Dashboard”.
- Click the button “Click for Settings” located next to “Your Facebook Pixel”.
Before you continue to the next step, you need to go back to Facebook to copy your Facebook Pixel ID.
Go back to Facebook’s events manager (or click this direct link)
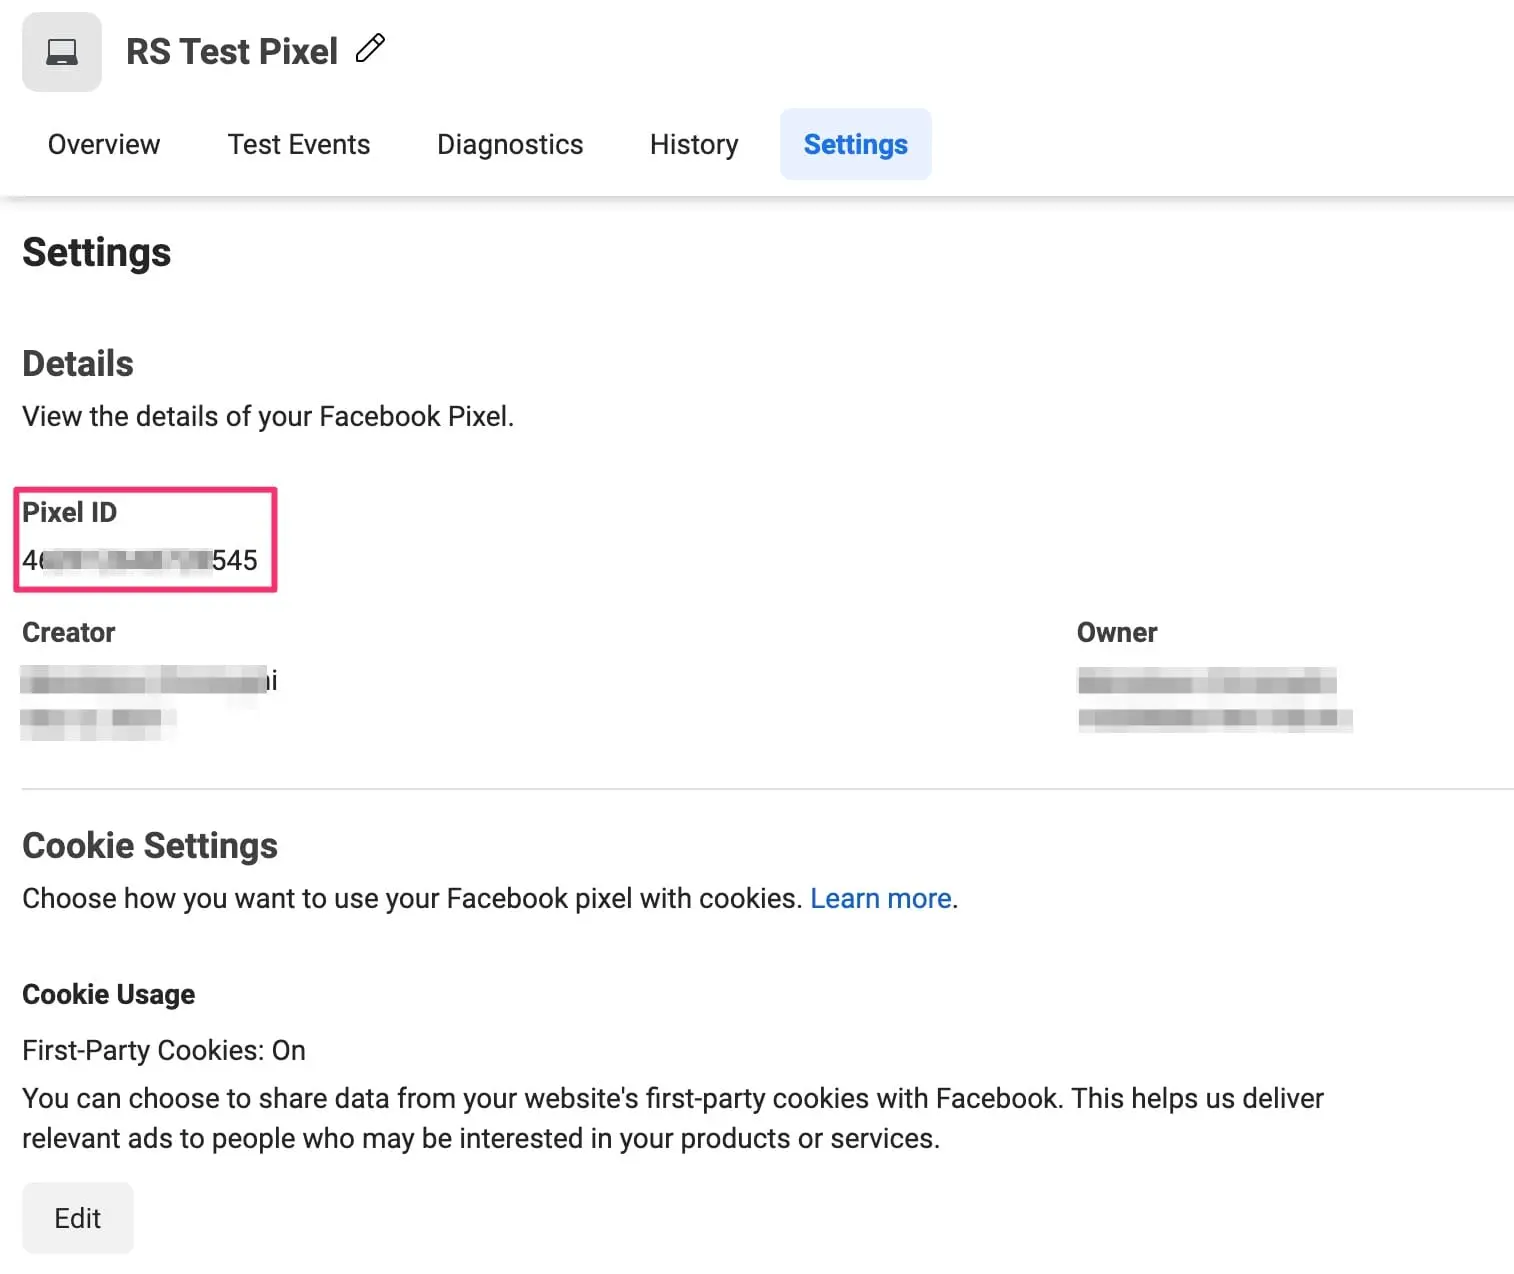
Locate the pixel you created on Step 1 and go to “Settings”.
Copy the PIXEL ID.
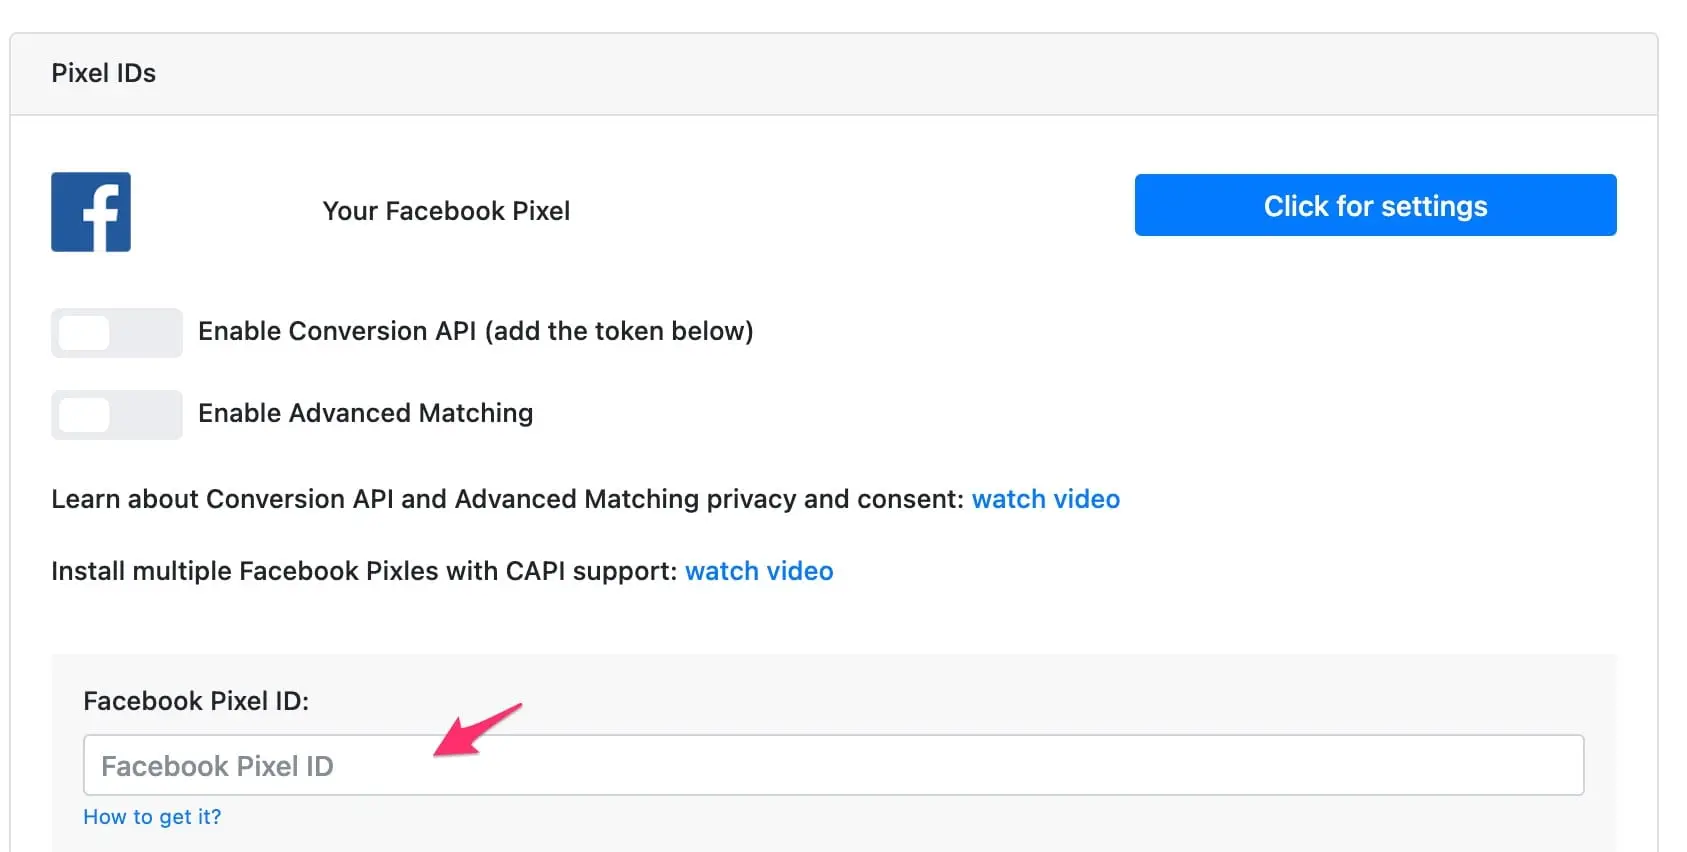
Now, go back to WordPress and enter the Pixel ID in the “Facebook Pixel ID” box, as shown below.
The final step is to save you changes. Scroll down the page until you find the “Save Settings” button.
That’s it, you’ve just installed the Facebook Pixel code to your WordPress Website!
How to Add Pixel Code to WordPress Manually (Without a Plugin)
Adding the Facebook pixel to your WordPress website without a plugin is a straightforward process for simple websites.
The process is the following:
- First, you need to create a Facebook pixel (as explained above)
- Then you need to add a piece of code to the HEAD section of your website
To get your pixel code, go back to Events Manager, and click the “Continue Pixel Setup” button.
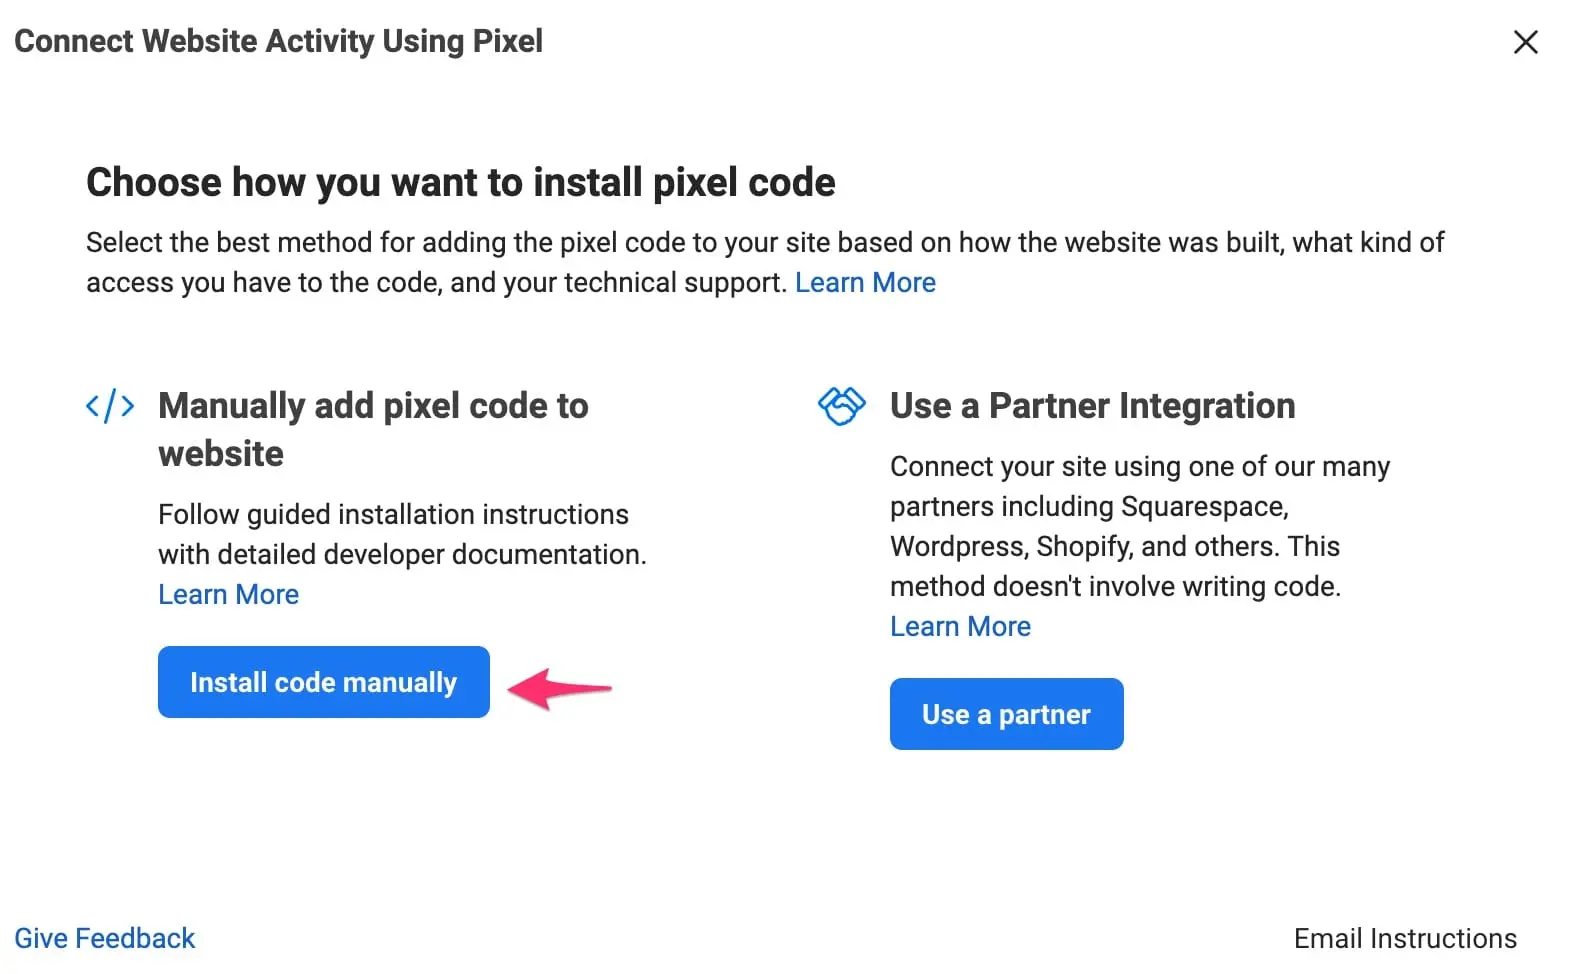
Choose “Install code manually” from the popup menu.
Click the “Copy Code” button.
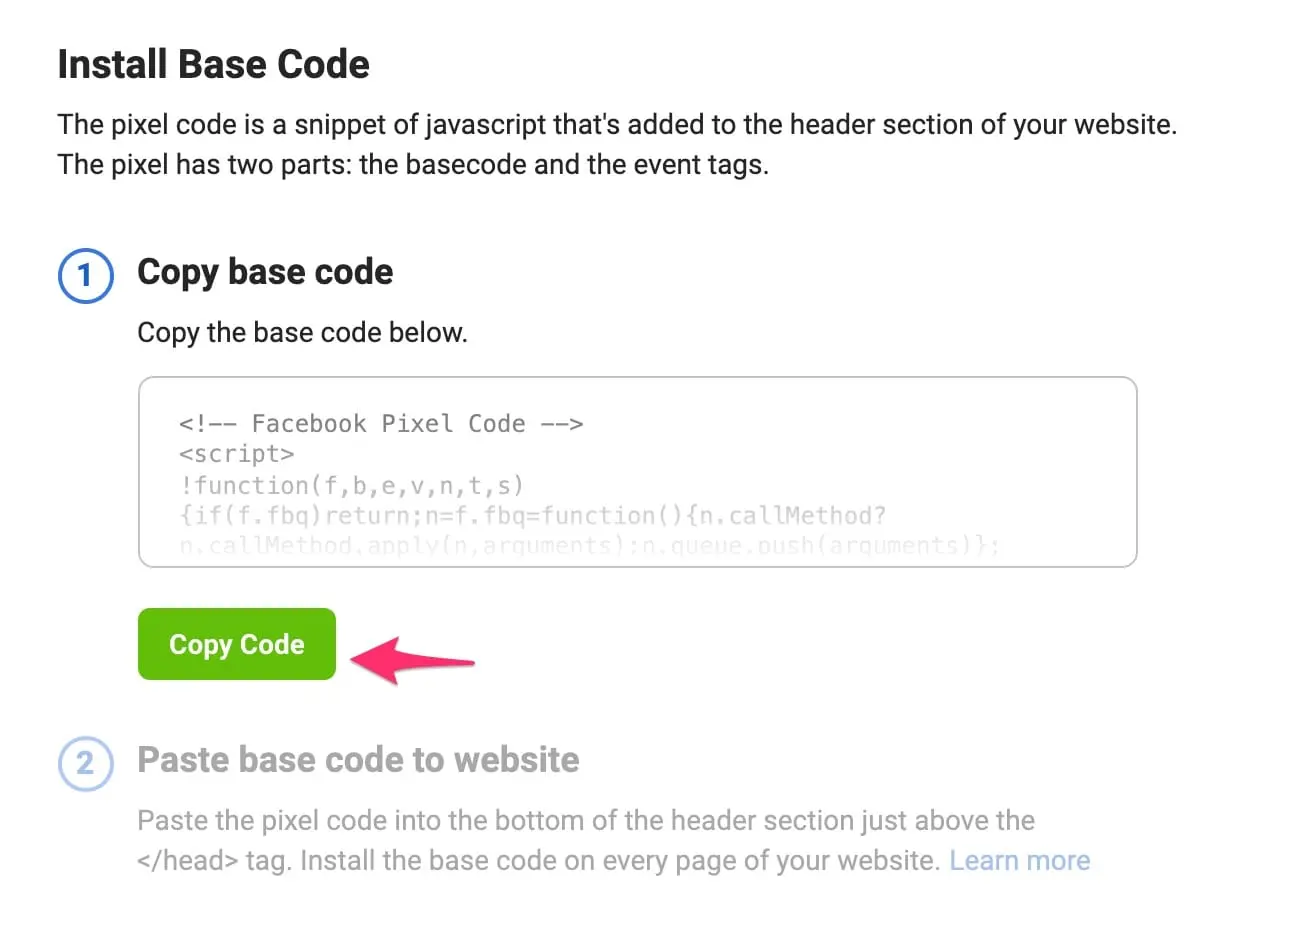
Go back to WordPress and select “Customize” under “Appearance”.
Select “Theme Settings” and then “Header/Footer Scripts”.
Paste the pixel code in the first box (</head>) as shown below.
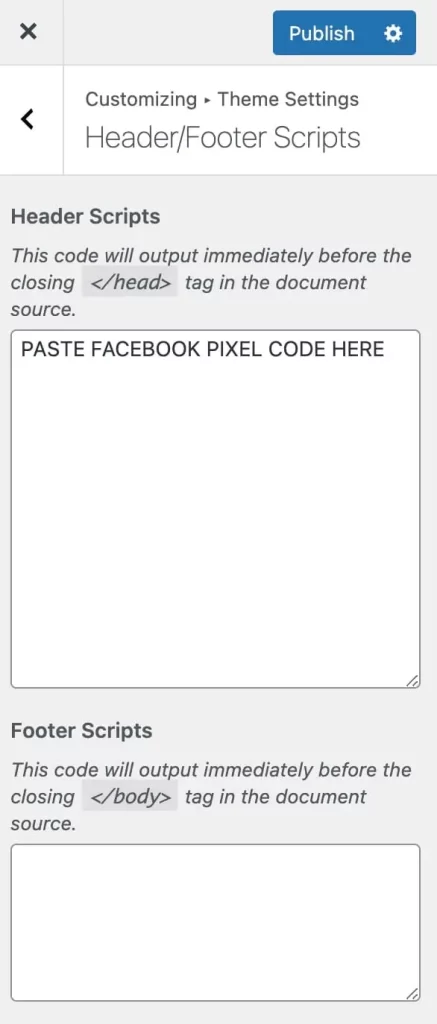
Click the “Publish” button to save your changes.
That’s it! You’ve just added the Facebook Pixel Code to WordPress.
Configure Pixel Additional Settings
Once you have the pixel code installed on your website, there are some additional settings to review/configure.
Set Automatic Advanced Matching to ON
Go to Events Manager and select the pixel created above. Click Settings and then make sure that Automatic Advanced Matching is set to ON.
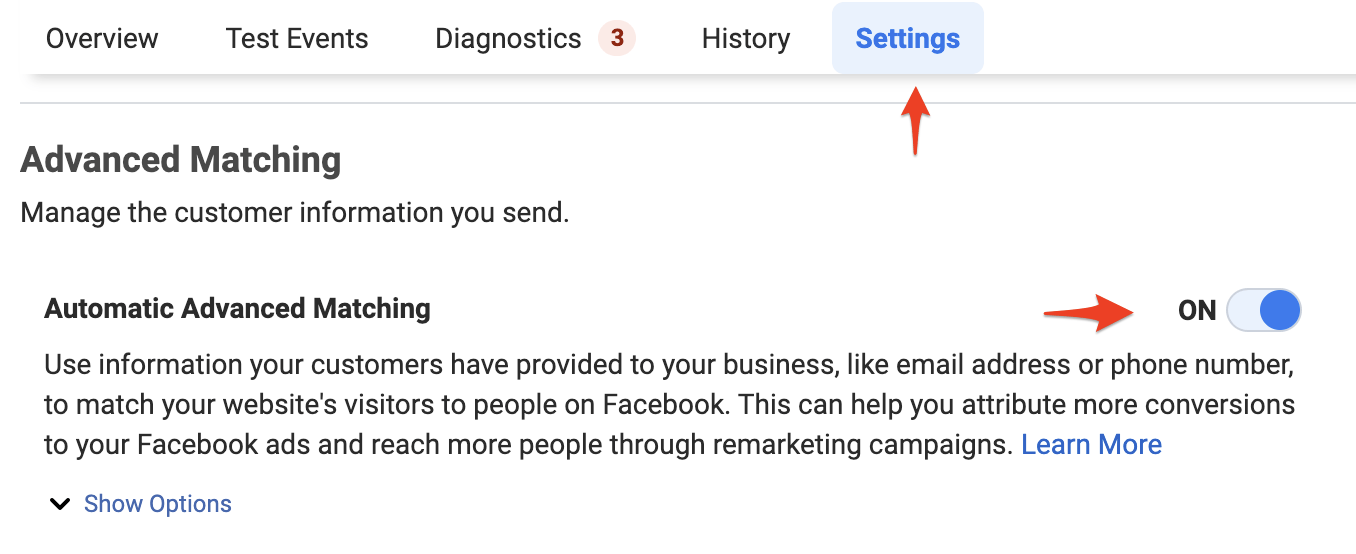
This setting will help Facebook match your website’s visitors with Facebook accounts and improve your campaigns’ performance.
Set Track Events Automatically Without Code to ON
Scroll down the page and enable the switch “Track Events Automatically Without Code” to ON.
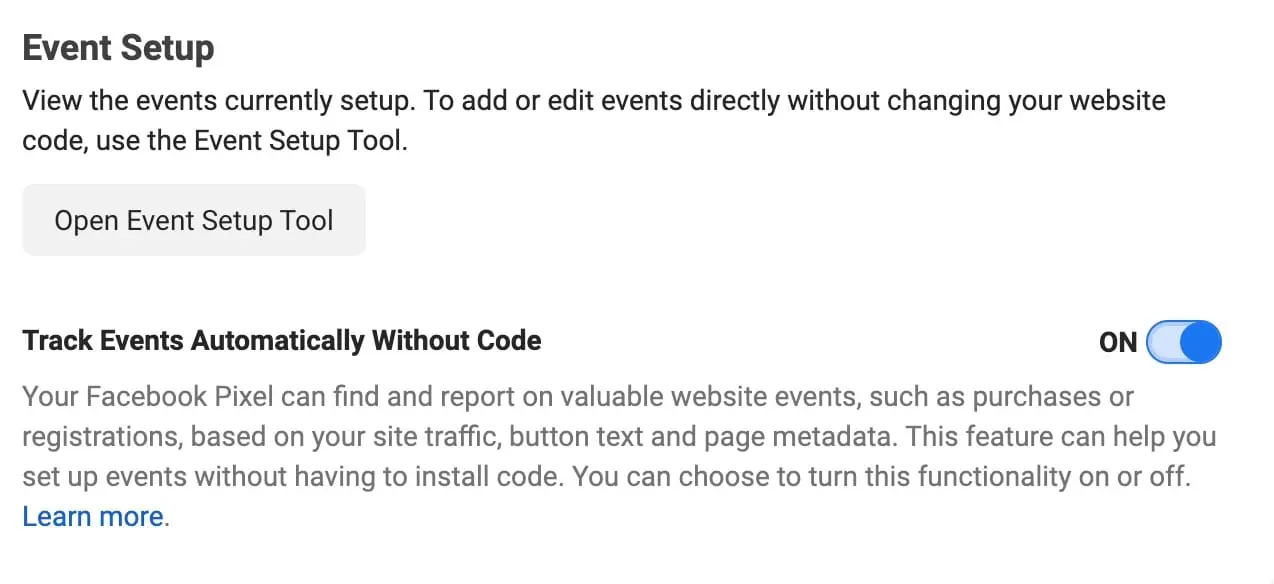
This will allow the Facebook Pixel to find and report on important website events, such as purchases or registrations, based on user engagement on your website.
This feature can help you set up events without having to add any additional code to your website.
Traffic Permissions
While on the Settings Page, scroll down to Traffic Permissions and click the EDIT button.

Add your domain name in the text box area and click Next.
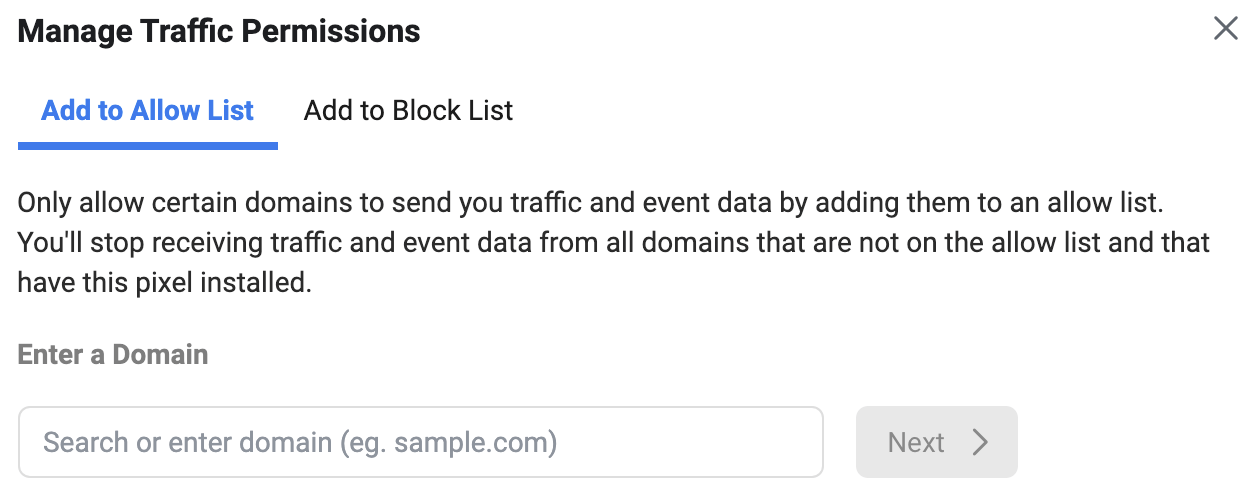
This setting instructs Facebook to consider events coming from your domain (and subdomains) only and block requests coming from other websites that might be using your pixel.
This is useful in cases your content is being copied on other websites.
Even if you don’t face any similar issues, it is still recommended to configure this setting.
How Test Facebook Pixel Code Installation
To make sure that your Pixel is set up correctly, you can use any of these methods:
- Using the Test Events tool
- Check the Diagnostics tab
- Use the Facebook Pixel Helper Chrome Extension
Using the Test Events Tool
Use the Test Events tool to check that your pixel is working properly.
- Go to Events Manager.
- Select your pixel from the Data Sources tab and click Test Events.
- Enter your website URL and click Open Website. This opens your website in a separate window or tab.
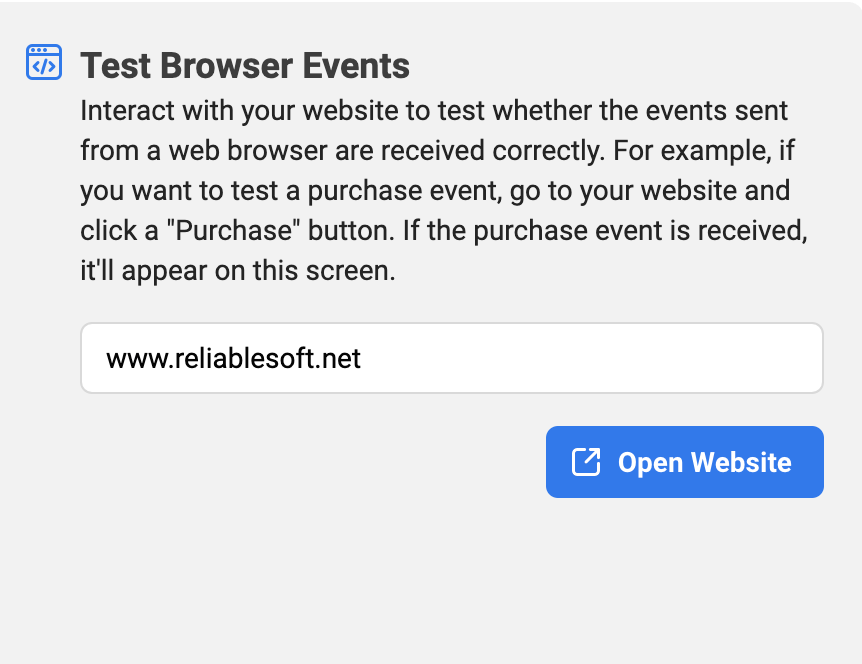
Interact with your website to test the events you’ve already set up. Your interactions will appear in the Test Events tab within 30 seconds.
Make sure that during this test you visit all important pages of your site and click on all the buttons you want to track actions.
Check the Diagnostics tab in Events Manager
To find and resolve problems related to your event setup, you can click the Diagnostics tab in Event Manager. You’ll find recommendations to improve your event setup if an issue is detected.

Facebook Pixel Helper Chrome Extension
Another way to test your pixel installation is to use the Facebook Pixel Helper Extension available for the Google Chrome Browser.
Install the extension by using this link.
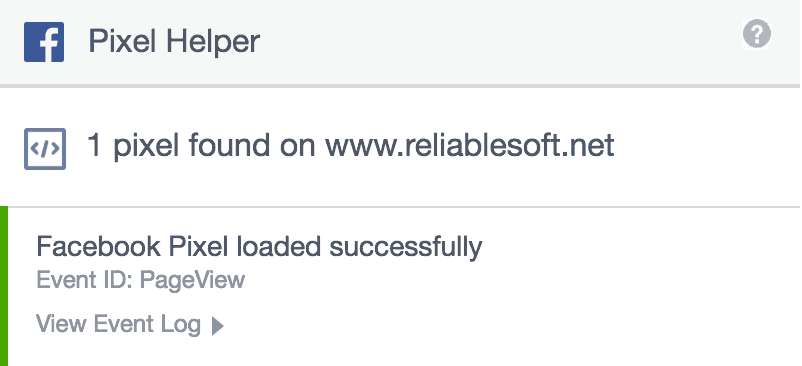
After installing the Pixel Helper, you will notice the FB Pixel Helper Icon in your browser address bar.
Navigate to a page of your website (that the pixel is installed) and click that icon. If everything is ok, you should see something similar to the screenshot below with the message ‘Pixel loaded successfully.’
What about eCommerce Websites running WooCommerce?
When it comes to eCommerce sites the process can be a bit tricky. It requires some programming knowledge and a good understanding of how WordPress works.
Basically, besides adding the pixel code to your website’s head section, you also need to configure events such as add to cart, checkout, purchase, etc.
If you’re not comfortable with changing your website’s files, it is highly recommended to hire a developer to help you with the implementation or use the paid version of PixelYourSitePro.
The paid version integrates natively with WooCommerce and also supports the new Facebook Conversion API process which adds more accuracy to what Facebook can track.
Conclusion
To sum up, if you’re running a blog or a non-eCommerce website, you can add the code using the free version of PixelYourSite or add it manually to the “Header/Footer Scripts” section of your website.
If you’re running an eCommerce store or a website selling services, you can use the paid version of the PixelYourSite plugin to add the pixel code, enable conversions API and configure the necessary events, without writing any code.
Alternatively, you can hire a developer to add the pixel code (and configure any events).


Leave a Reply